Tips for Painting Stair Balusters
Last year I did more projects than I could even blog and I learned SO much, so many things to tell you about! One of the most obnoxious projects we did was painting stair balusters. Obnoxious because we did it wrong. So I’m here to save you from the giant headache that we had to deal with and be thankful you read this post about painting stair balusters before trying to do it yourself! I don’t have a ton of pictures but I will try to be as explanatory as I can.
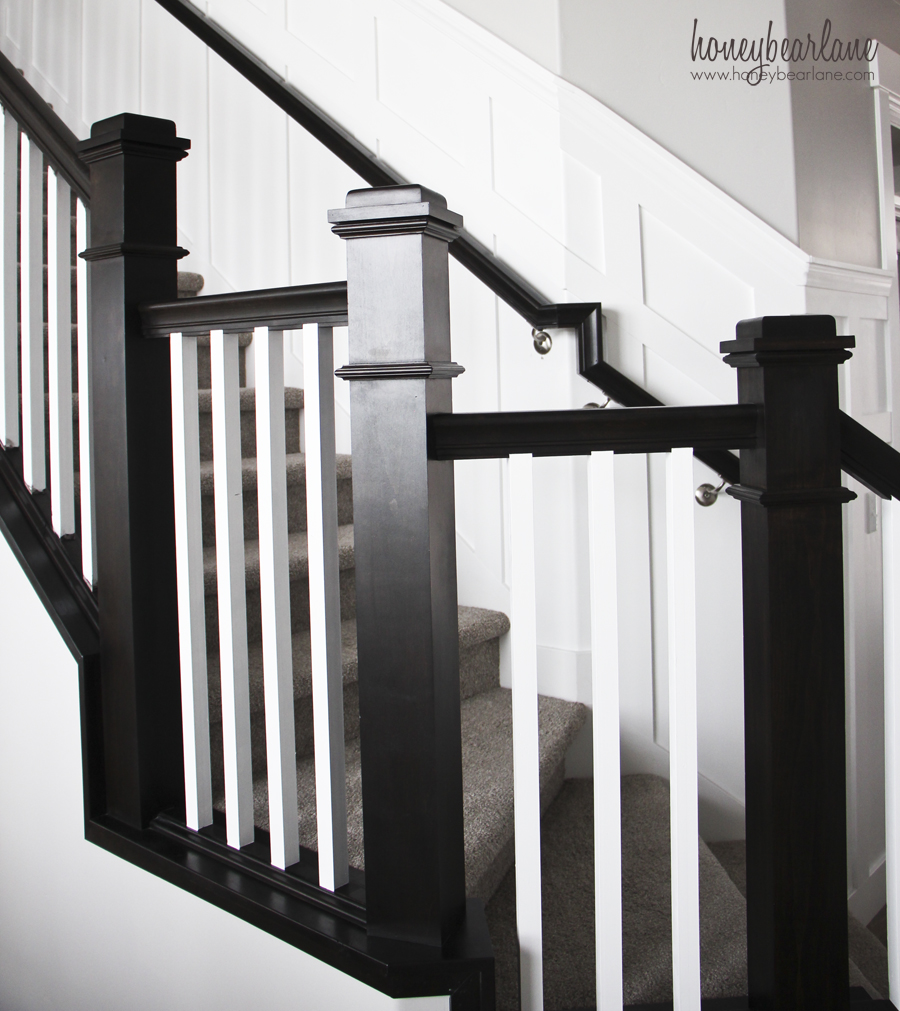
First of all, our stair balusters are square and plain. They were stained dark, the same color as our railing. The home builders wanted to charge an extra $1000 to have the two-tone banister.
Before:
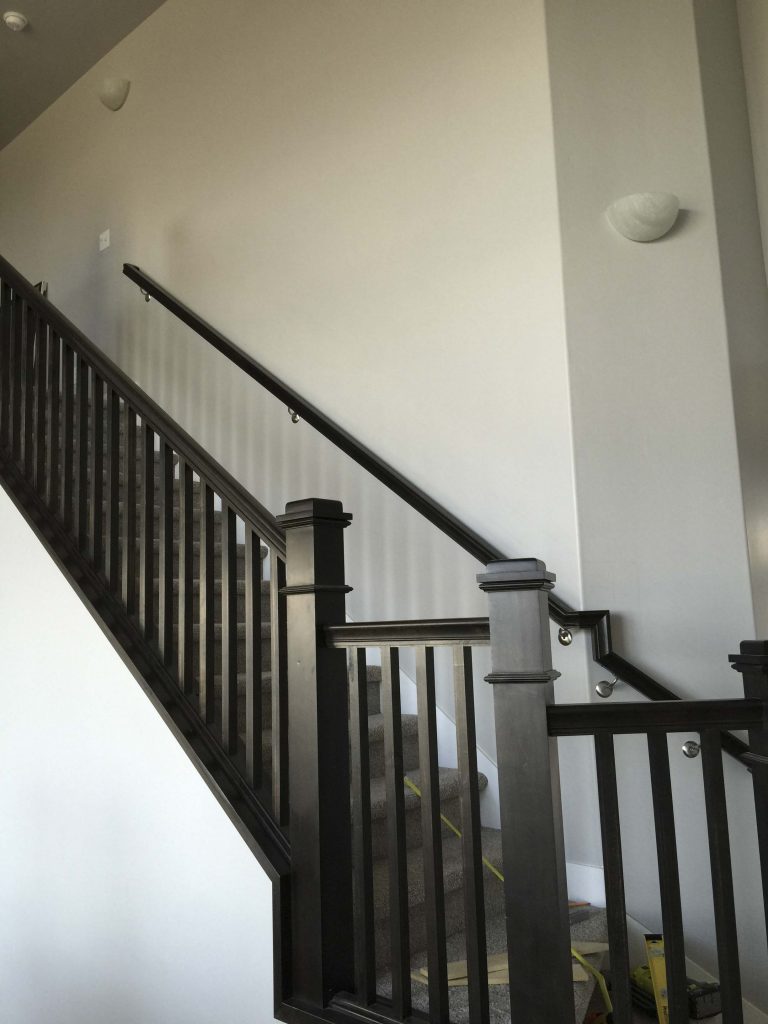
We decided it wouldn’t be too hard to paint them and save the money. (We couldn’t have been more wrong, sadly.) But don’t let that deter you from trying yourself after reading this tips.
Don’t use oil-based paint. This seems like a no-brainer. But I had decided to use an oil-based primer because the finish was so smooth on the balusters that it didn’t seem like a latex would stick. But I wish I would have tested it with latex and waited a few days before seeing if it would scratch off or not. Or maybe used chalk paint. I had roughed it up with sandpaper and it didn’t seem to get any rougher. So I used oil-based primer and when we had to go back and fix bleeding, it was next to impossible to get it off. Listen to me and only used water-based paints and rough it up with sandpaper first.
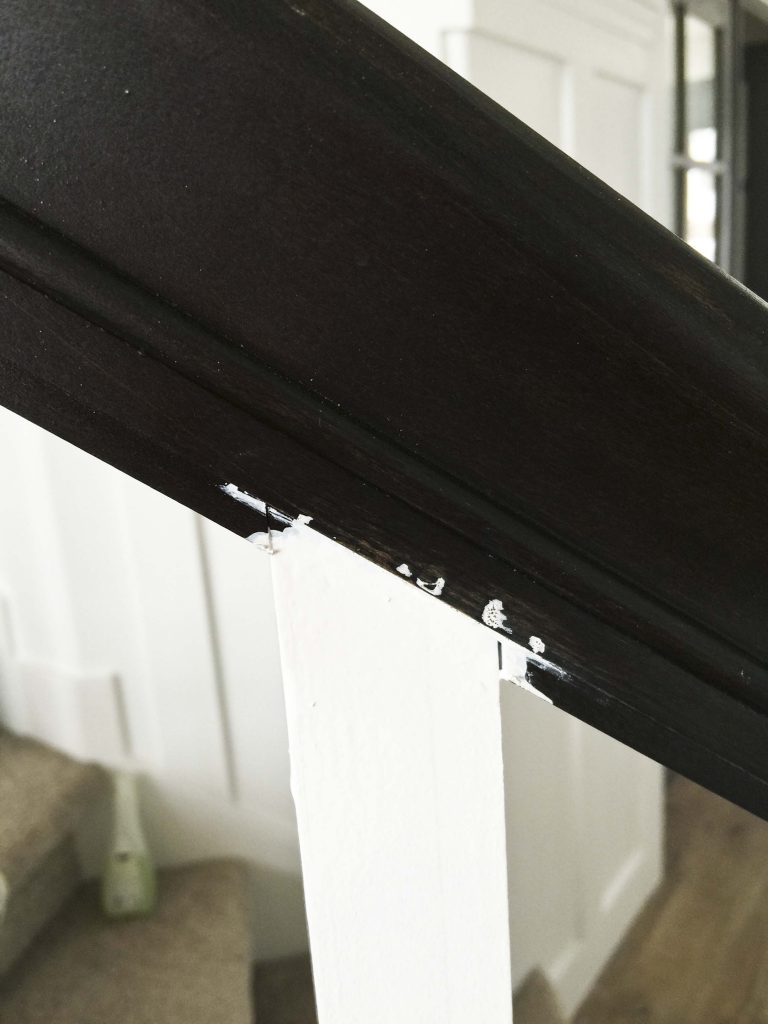
Take your time with taping. Taping is the most boring and tedious thing in the world but when it comes to painting balusters, it is the most important thing ever. If you do a really good job with taping and use a really firm tape, it will save so much time when correcting mistakes. Use really sticky tape, like Frog tape. Some tape is better for walls and some is better for wood–so use the one meant for wood. It can take some super sticky tape. When you tape, use a paint scraper to go over the tape really well to make sure it is really firmly down and that nothing can get through.
Use a foam roller brush to paint the balusters, it’s the best way to get a smooth finish. But don’t touch the top or bottom of the baluster with the roller brush. Use another small foam brush to stipple the paint on and then smooth it out. It’s so worth it to take your time with these detail areas and get it right the first time rather than fixing mistakes later. The less mistakes to fix later, the better.
To fix mistakes: You will probably still have some bleeding that you need to touch up. What works best with latex paint is a little bit of denatured alcohol and some cotton swabs. This will take off latex paint pretty well, especially if it hasn’t had too much time to dry. This does not work with oil based paint though.
If the denatured alcohol doesn’t work, we used a light sanding pad to get into tiny nooks and crannies, especially the angled ones. If you take off stain from parts that are stained, you will need to re touch that area. We had a ton of this because of the oil-based paint and we had to contact the painters from our home build and find the exact stain they used. But it’s nice to have on hand because now we can match other wood projects we might want to stain to match later.
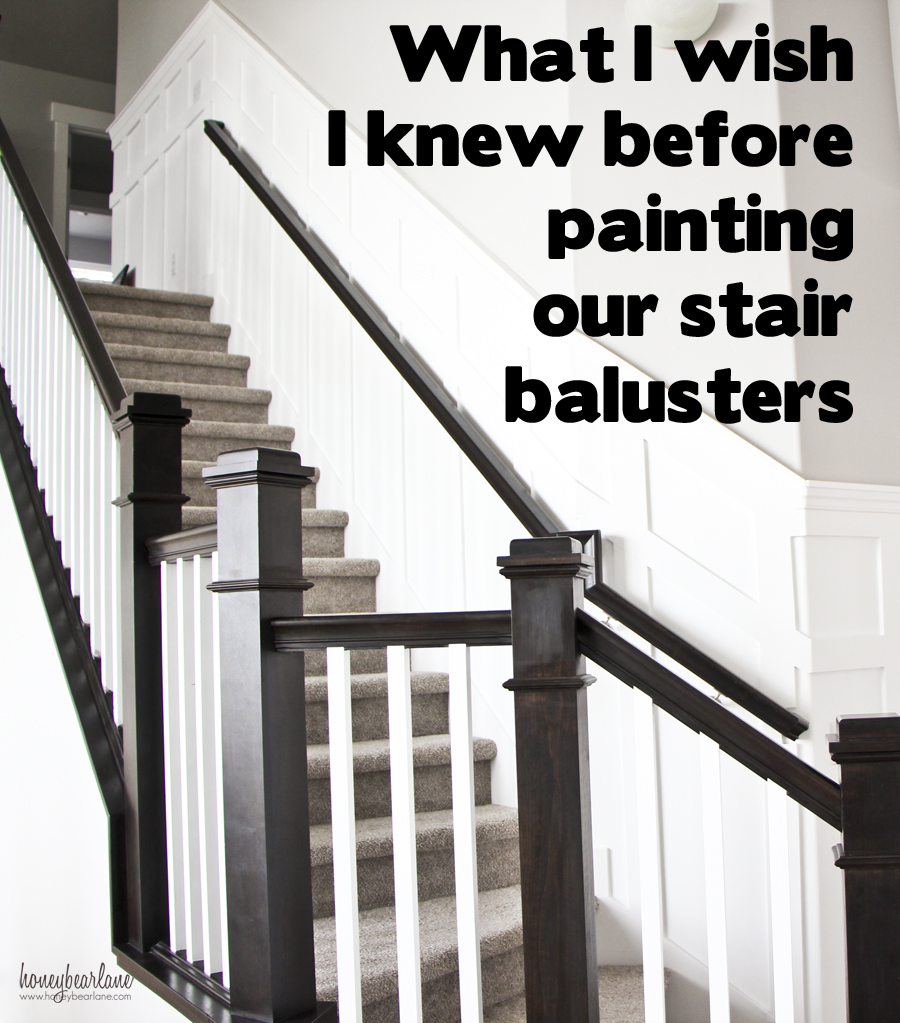
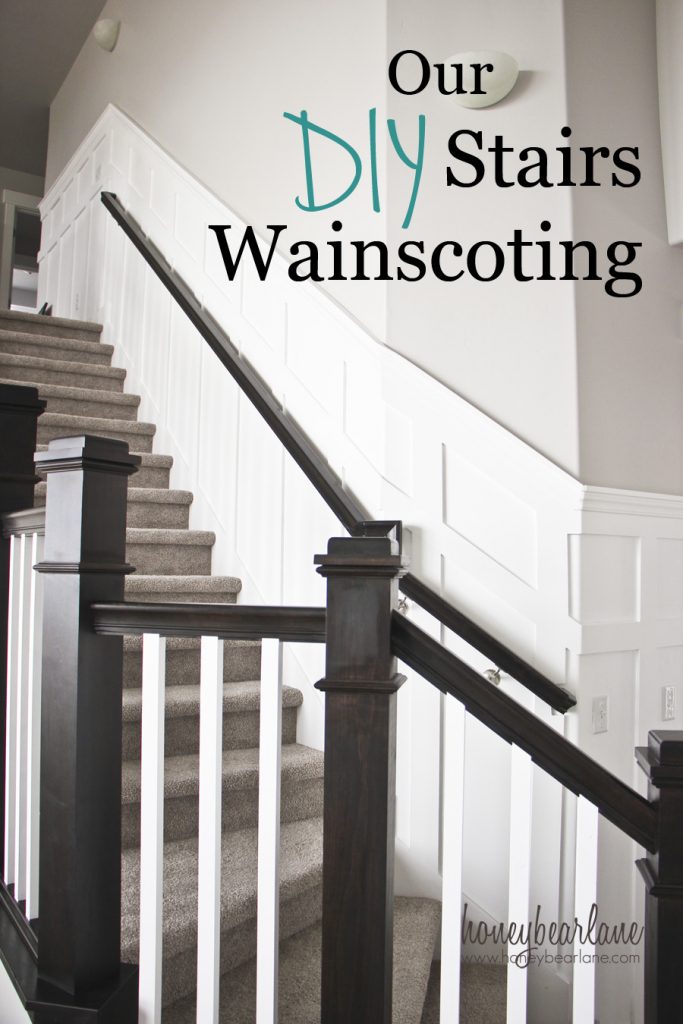
Almost all our mistakes had to be sanded down and re-painting or stained. My husband wasn’t satisfied with my attempts to fix it so he took over this project, being the perfectionist he is. So I gladly let him do it, even though it literally took him the rest of the year to finish. And he still has one section to go through and who knows when he will get to that! That being said, I’m so glad we did this project of painting stair balusters. I love the look of the tone-on-tone and it looks so nice with all our wainscoting. I can’t wait until we can finally rip out the carpet and put it beautiful wood treads. But that probably won’t happen for awhile.
Like this post? Read more DIY posts here:
 Floor to Ceiling Board and Batten

I have the same staircase and my balusters on the knee wall unscrew. On the flat (the landings) they do not. Would this project have been easier if you simply removed the knee wall balusters? Then you wouldn’t have needed to tape and the paint finish would be uniform all the way to the ends. Thinking about tackling this soon…. Or just replacing all of the wood with iron.
Yes, if you can remove the balusters I would do that. Ours do not remove so we had to tape them.
I did mine and found this to be one of the easiest and cheapest updates to do, all of our railings were that “honey” color. Sanding was very time consuming, I’ll admit. I own multiple sanders however none will get in the tiny detailed grooves. I had 4 floors worth of railing to complete, and like your husband, I’m fragging my feet on the last few. The sanding is the tedious part. Some tips for me (many of which you’ve stated)
– sanding sucks, tedious, boring, and very unsatisfying
– I used a 120 grip sandpaper, I know it sounds rough, but you can’t even notice grooves or scratches after the paint fills it in
– I primed with this stuff called GRIPPER can’t recall who makes it, but a small $10 can goes a long way, I always have an extra can around the house
– I found that painting that banisters railings was easier as I painted the railings a gray color and the banisters white. I just figured it would be easier to cover mistakes with gray over white, than white over gray
– taping is keys!!! Next to the stairs, if carpeted be sure the tape back the carper
– I did 2 coats of white on the banisters, and about 4 coats of gray on high traffic areas like the railings
Wish I could add a pic, I’ve also done the same thing with my bathroom cabinets and painted them white. Same technique minute the gray color. The GRIPPER is awesome. I’m probably OVER-sanding, but I wanted to make sure it was going to stick
I swear I checked for typos and grammatical errors. Stupid iPad!
That’s a lot of railings you painted–bravo! Great tips!
I want to do my railings gray. What did you use, paint or stain? And what color?
Would love to see pics I’m taking on this project as well, started the sanding wish I would have left well enough alone seems like a huge project
I’m embarking on the same adventure/project. Do you think the foam roller would work better than a brush since my balusters are the tapered kind round above with a small millwork ring then square at the bottom? Originally someone had painted water-based latex over stain which then raised the wood grain which does not look good. Its a mess! I’ve stripped and sanded a couple of the railings and not sure how to make the balusters look smooth. New ones would be better but a complete disassembly is out of the question at this time. Any suggestions would be greatly appreciated. And thank you in advance!
I did use a foam roller at first but it leaked through the tape. The biggest key is to ensure a very tight seal with the tape! I feel like you have more control with the brush.
Damn I like your dark staircase, remove the carpet and add dark treads and white risers and it would be beautiful.
Thank you! We plan on doing that someday.
I love the wainscot on the stairs wall. How far did you space rack slay and how high is it?
They are spaced about 12″ apart and about 3.5′ high.
Hi! I’m about to embark on this and am super nervous. A majority of the sanding is done… But choosing a paint color is stressful. I love the color you have for your railing, what is it?
Thanks for the tips!
My color is actually just ultra white in satin!
Hi dear,
May i know what color.you use for hand rails?
The dark stain was a custom stain by a company here in Utah, so I’m sorry but I don’t know!
I’m about to undertake this in my 40yo home. Some genius repainted the balusters without prepping the surface so they peel if you look at the wrong! 😩 Also, we had the treads stripped and refinished with just poly, no stain, so they are white oak, handrails are walnut= very mismatched! I want to do balusters and rails in white. Plan is to sand back peeling paint and rough up the rest, prime it all, and double coat with semi-gloss white. This seems to have worked well on my fireplace mantle, but do I need to seal the railings with anything since they are high-traffic? If so, what?
Good luck! That sounds like a big project. I would definitely seal the banister, it helps the paint job last a lot longer and if it gets something on it, like pen, you can clean it off without damaging the paint. You could try polycrylic, which is a water based sealer and doesn’t yellow as much as the polyurethane. Also see if you could find it in a wipe-on application because I think that might be easier.
I’ve been on this journey for about 3 weeks. I did the lower part of my railings and banisters. I used general finishes java stain and it was a breeze! Only thing is that it takes 24 hours to dry. But the finish is beautiful and you can see the wood. The stain is dark but not black. After that I painted the spindles with a primer and then latex paint. It was a catastrophe…the paint bled on my perfect stain and I had to sand it down. TAPING IS KEY. I was using the blue edge lock tape and it was not working. After the fiasco I used frog tape and used a straight edge to seal it….MUCH BETTER. I’m almost done…it’s not for the faint hearted but I’m loving where I’m at…I need one more coat of paint and then fix the stain on the bottom and then seal everything.
Oh man I’ve been there! You have to be SO tight with the tape. Good luck!
I had my stairs go from oak to all white. Big mistake. Now I’m wanting to make the handrails the Java Gel and re paint the balusters white as it needs touch up. I’m wanting to do the bottom dark as well. My question is well I ever see the the wood grain if I just lightly sand it and use the gel on the handrails? I’m reading mixed reviews.
I don’t have a ton of experience with gel stain. I would imagine the only way to really see the wood grain is if you sand off a fair amount of the paint, but also if you do that unevenly then it might look uneven through the gel stain. Sorry that’s not very helpful!
Pretty component of content. I simply stumbled upon your blog and
in accession capital to say that I get in fact loved
account your blog posts. Any way I will be subscribing to your feeds and even I fulfillment you get admission to constantly fast.
Hey there! I’ve been following your blog for a while now and finally got the bravery
to go ahead and give you a shout out from Huffman Tx!
Just wanted to mention keep up the great job!
Wow, awesome blog structure! How long have you ever
been running a blog for? you make running a blog glance easy.
The whole look of your web site is excellent, let alone
the content!
Bummed I’m not able to view this post from my phone:
I’ve always been used to a classical look in a home, and I would like to replicate the wooden stairs that we used to have in our childhood home since it has a vintage look to it. I think I’ll have someone install some wood balusters in my home so that I can achieve the look that it had. Thanks for the tip that if I’m going to have it painted, I should use a really firm tape to make sure that the paint does not bleed.
Hi! I just came across your blog today and I am really enjoying it. Did you use paint or stain? What color is it? Looks great! Thanks!
The railing came stained so I’m not sure what the color is but we painted the balusters white–just the ultra white that doesn’t have color mixed in. Thanks!
My dad would like to have balusters installed on his stairs because this will surely add more sophistication to his livingroom. Thank you for this; we’ll make sure to use a paint scraper first before painting the balusters. It’s also a good thing that you clarified here the importance of using latex paint.