Build Your own X-Leg Outdoor Table
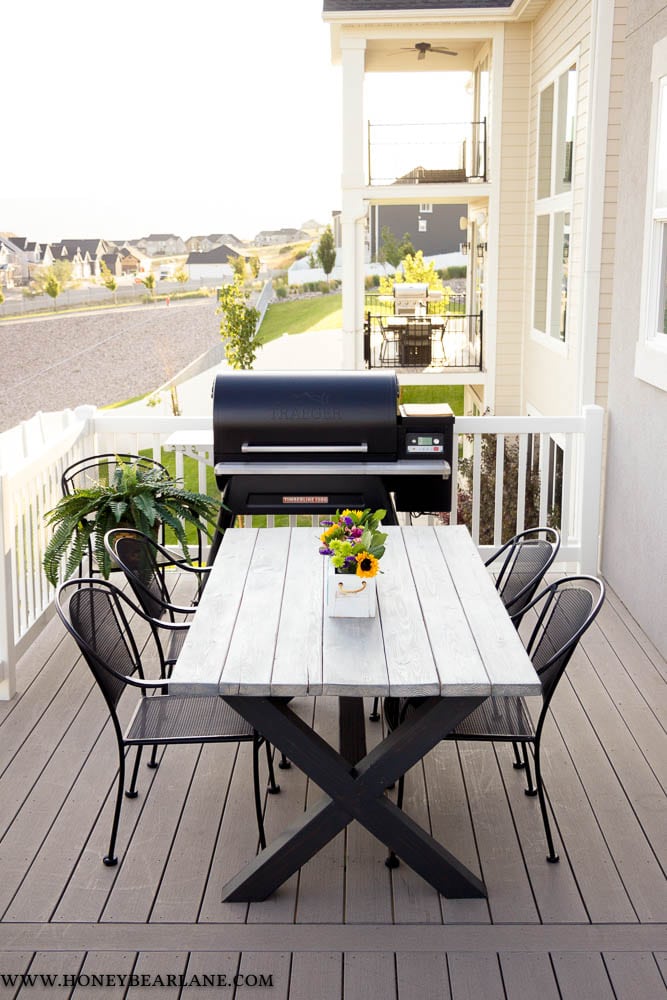
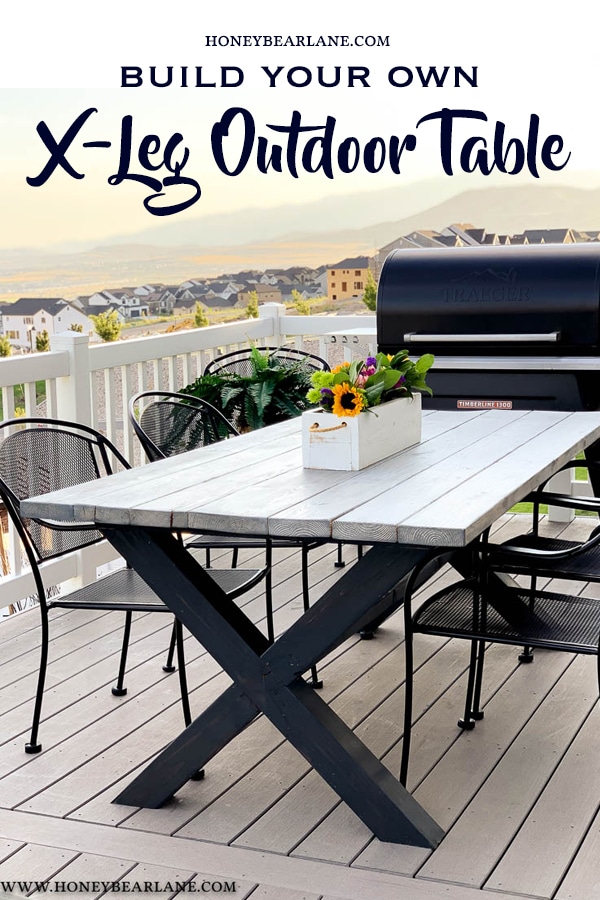
One of my bigger and more spontaneous projects this summer was building an X-leg outdoor table. We have a nice deck with a beautiful view and we haven’t really utilized it as much as we wanted to in our house so far. I built some outdoor couches a couple of years ago and we’ve used them from time to time, but the biggest issue is the lack of shade. Obviously this table won’t help with the shade, but it is fun to have it for eating dinner when the sun gets low enough in the sky to not be blazing hot.
I wanted to offer some concrete plans for this table, but to be honest, it was kind of trial and error. I first followed some plans which I found online but to be honest, they were pretty terrible. They left out a lot of details and I just kind of had to figure it out.
If you’re looking to build this table, make sure to read this entire post. I know the instructions are a little disjointed and all over the place, and I apologize for that. If I were better at Sketchup I would do it all in a neat and tidy document, but I have five kids and a very busy life and frankly I would NEVER get around to it. So here it is, in all it’s awkwardness. But I hope that all the right information is there. Leave a comment with a question if you have one and don’t forget to pin it for later!
Supply List for X-leg Outdoor Table
- (6) 2×6, cut to 72″ (buy in either 6′ or 8′ length) -$35
- (1) 2×8, cut to 72″ -$8
- (2) 4x4x8, see diagram for cut length -$20
- (4) 2x4x8, cut to various lengths -$12
- 2 1/2″ pocket screws and outdoor wood screws -$10
- Wood glue -$4
This table is so affordable to build. The total of all these supplies listed should cost around $90. And you have a super durable table that will hopefully last you for years to come!
Tabletop
The tabletop is straightforward, just a bunch of 2x6s and one 2×8 cut to 6′ and pocket holes connect it together. It’s heavy though! I had to move the legs to the deck separately from top because otherwise it would be too heavy.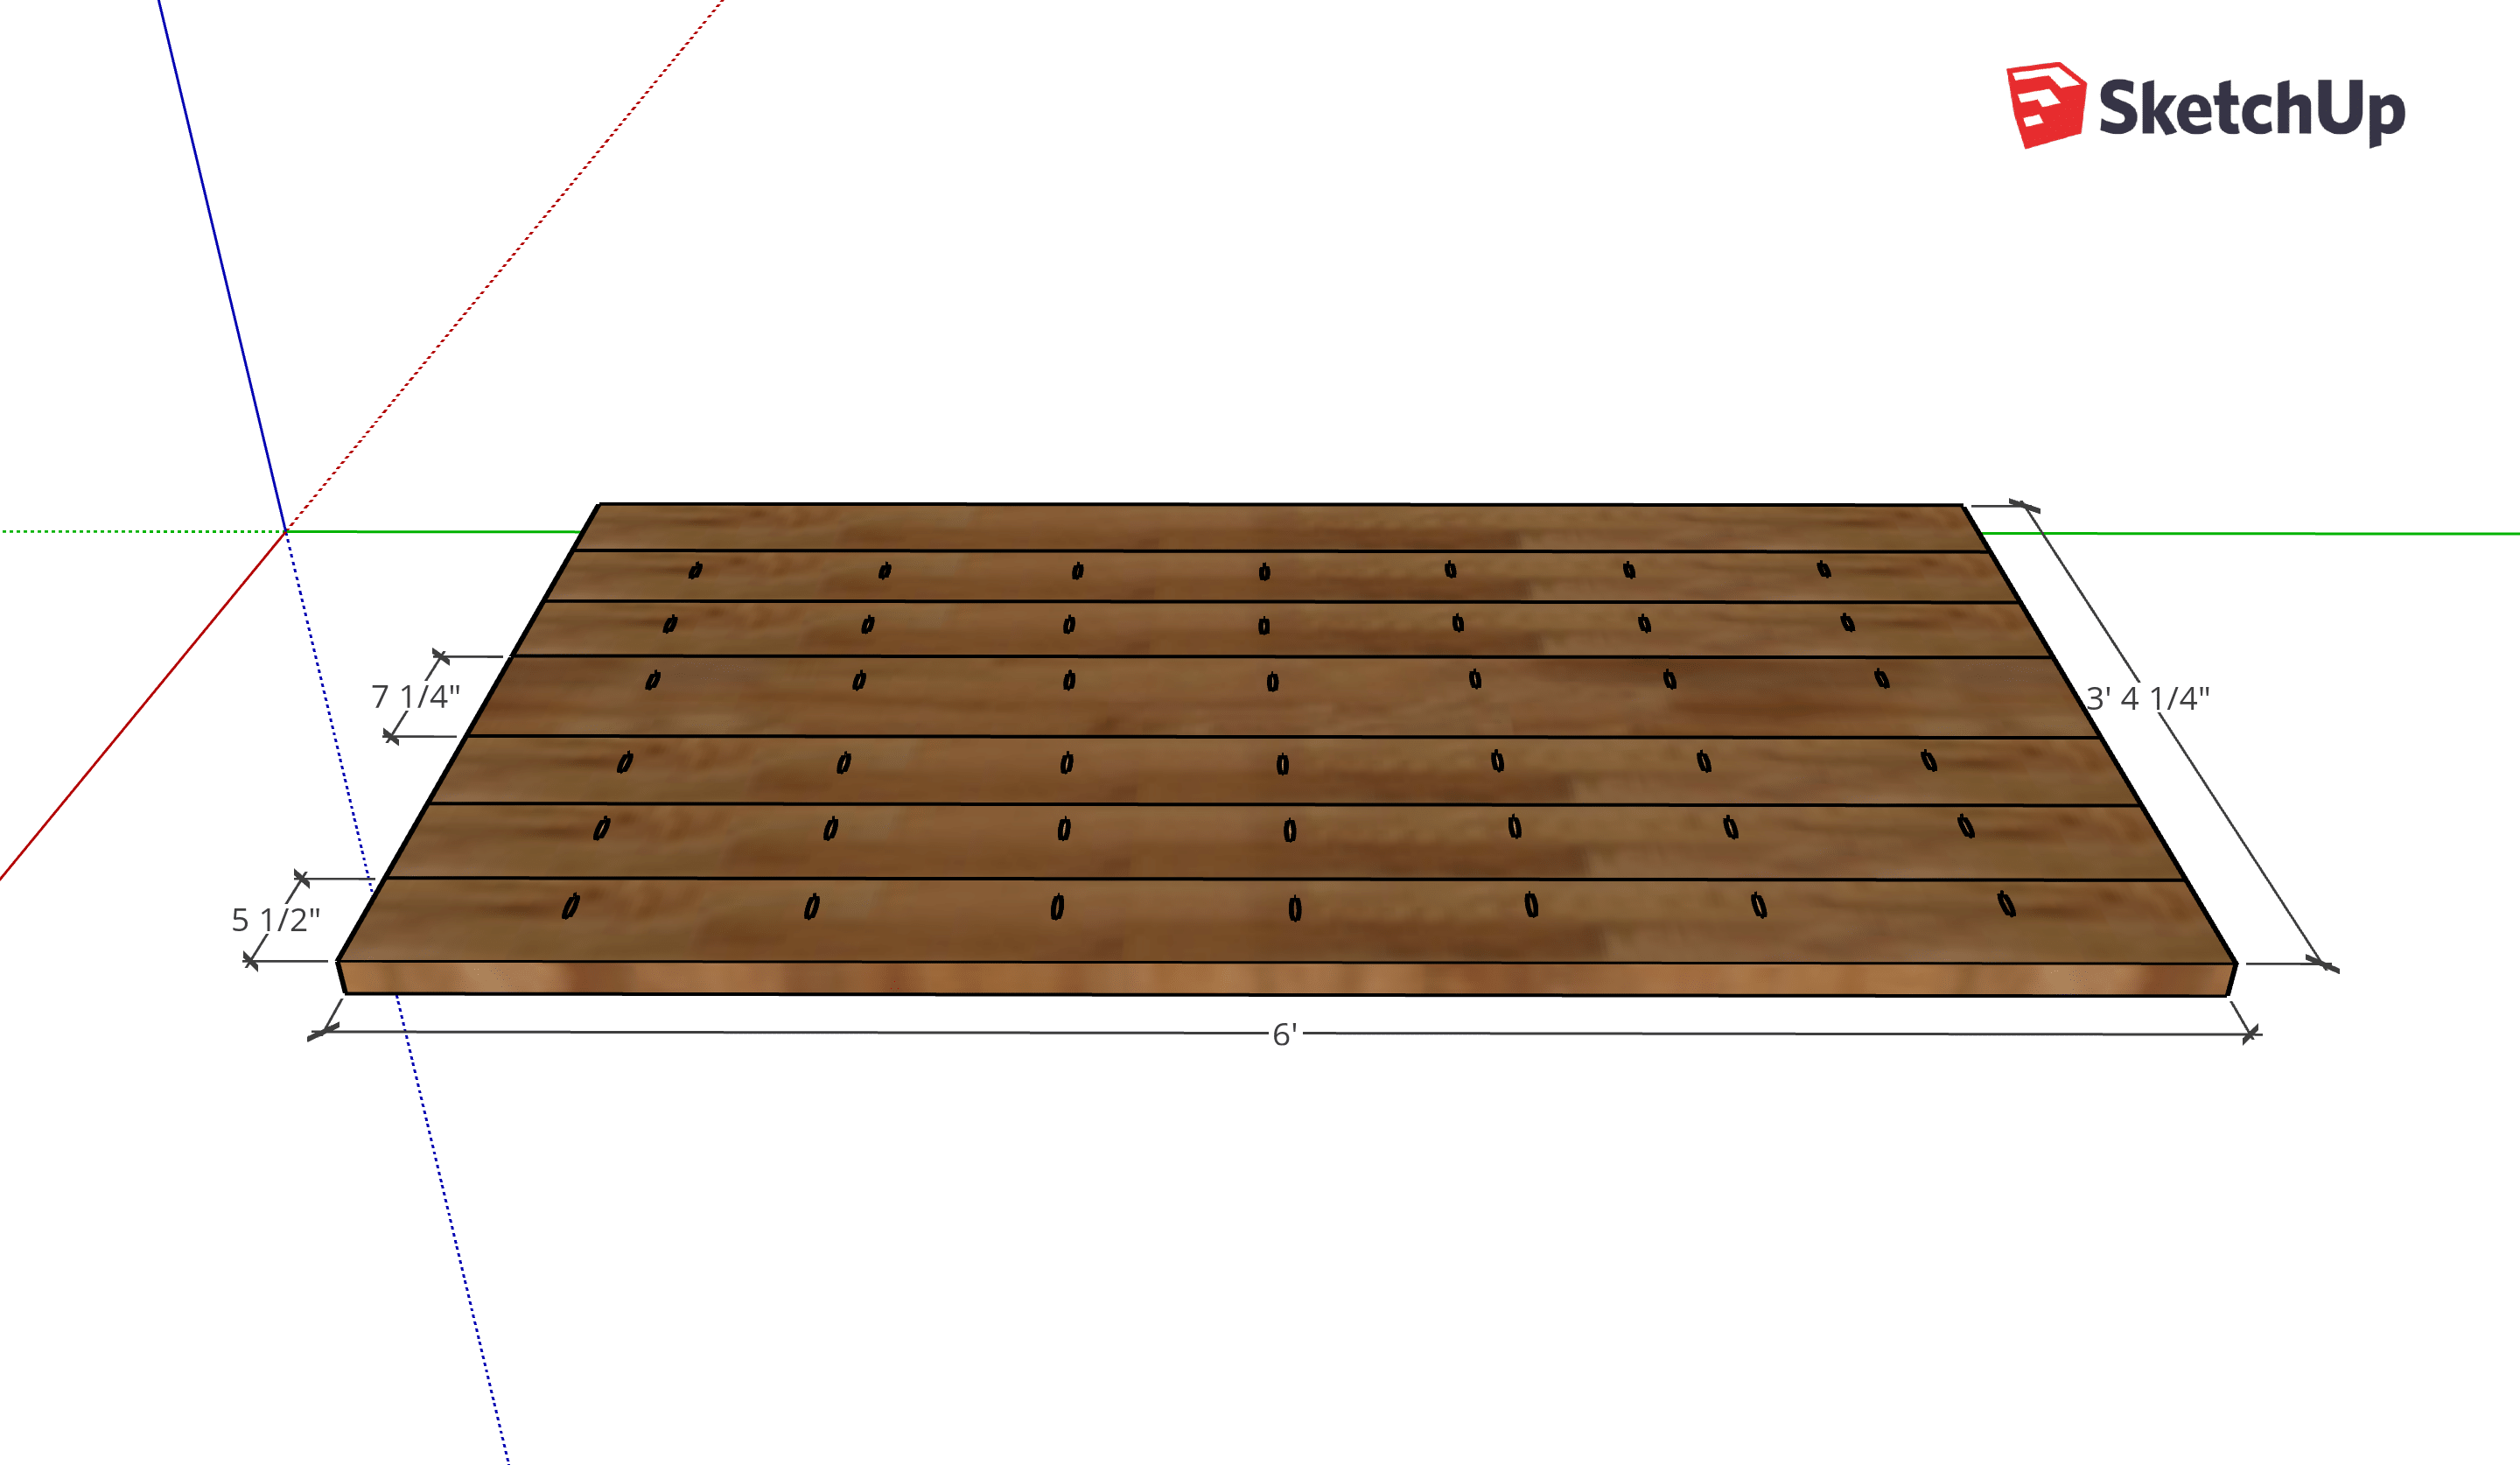
X-Legs
I ultimately followed the plans for the X-legs from Rogue Engineer, this table designed by my friend Ashley from Cherished Bliss. So to build the legs, I followed these plans exactly.
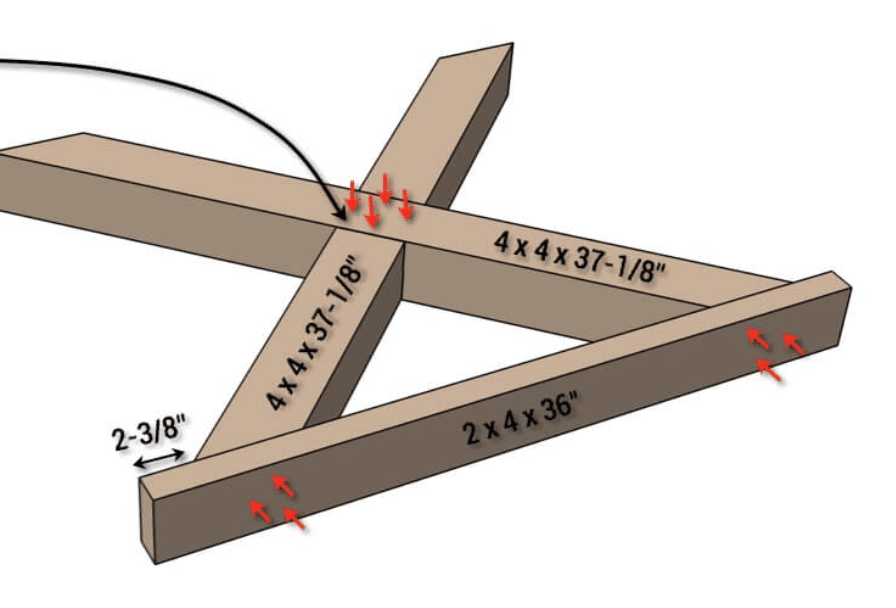
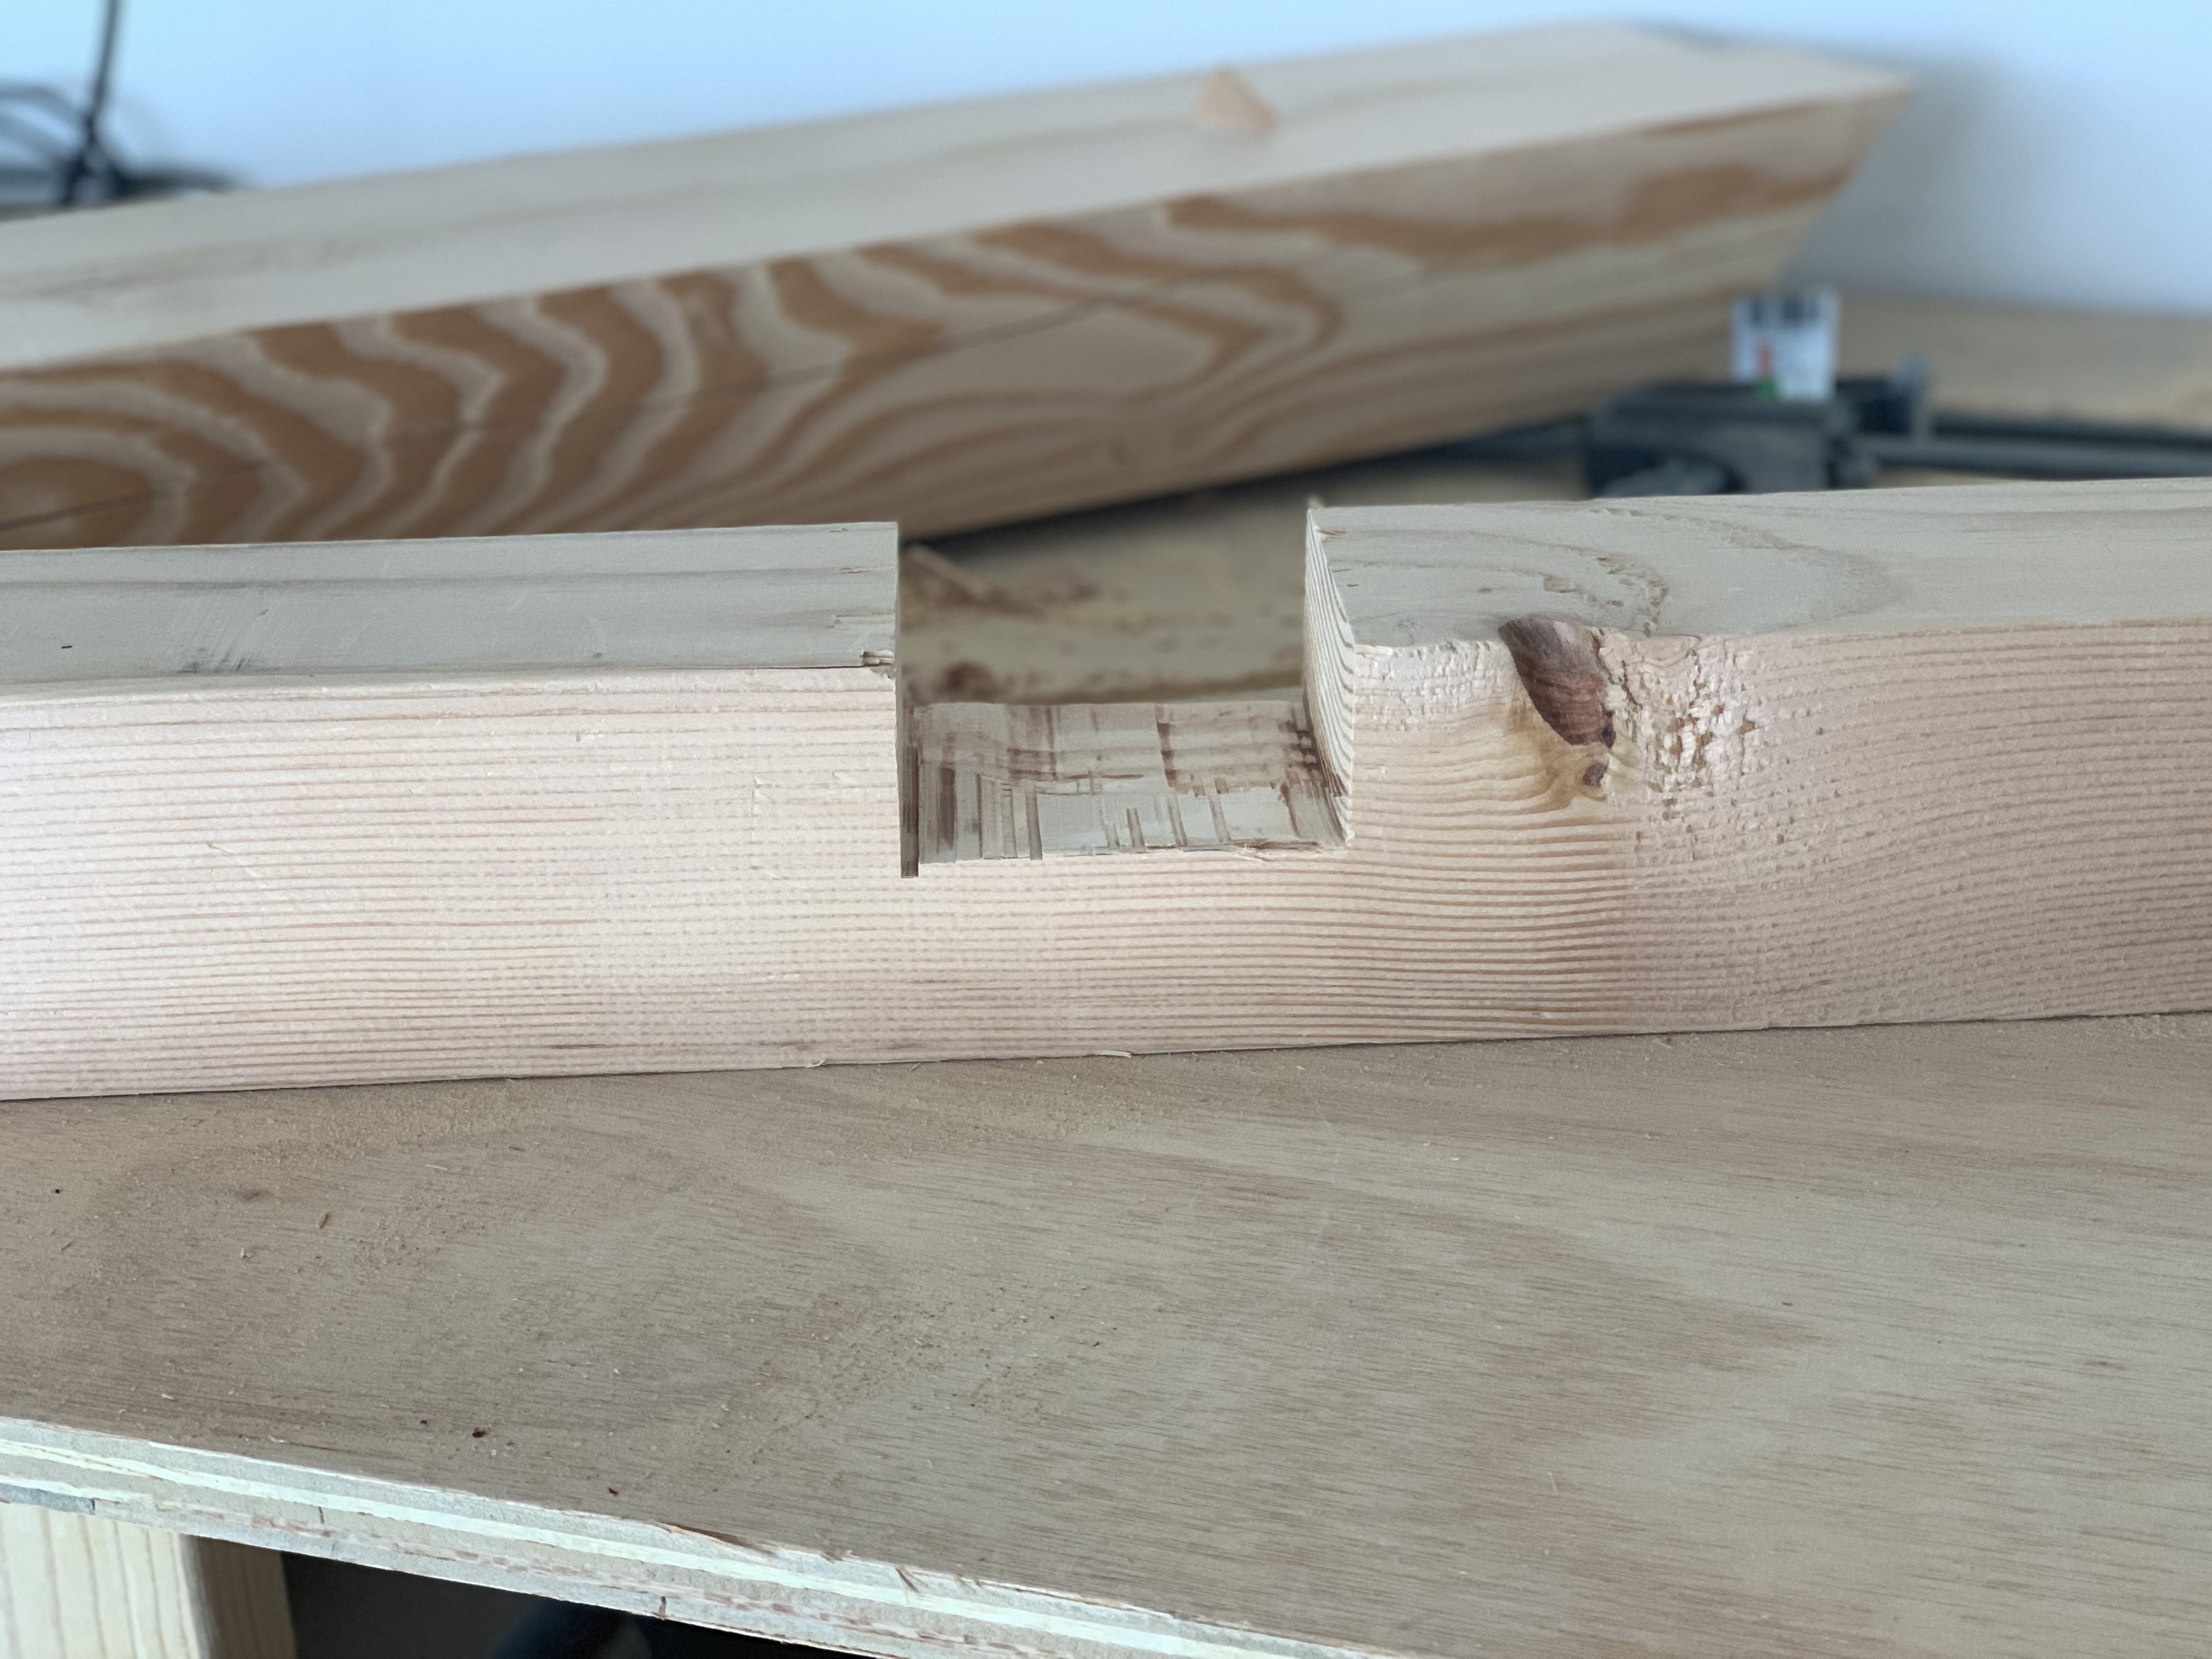
Using two 4×4 beams cut to length on a miter, I had to mark out the exact spots for making a notch in each one. This is where you just follow those Rogue Engineer plans because they are super clear and well marked out.
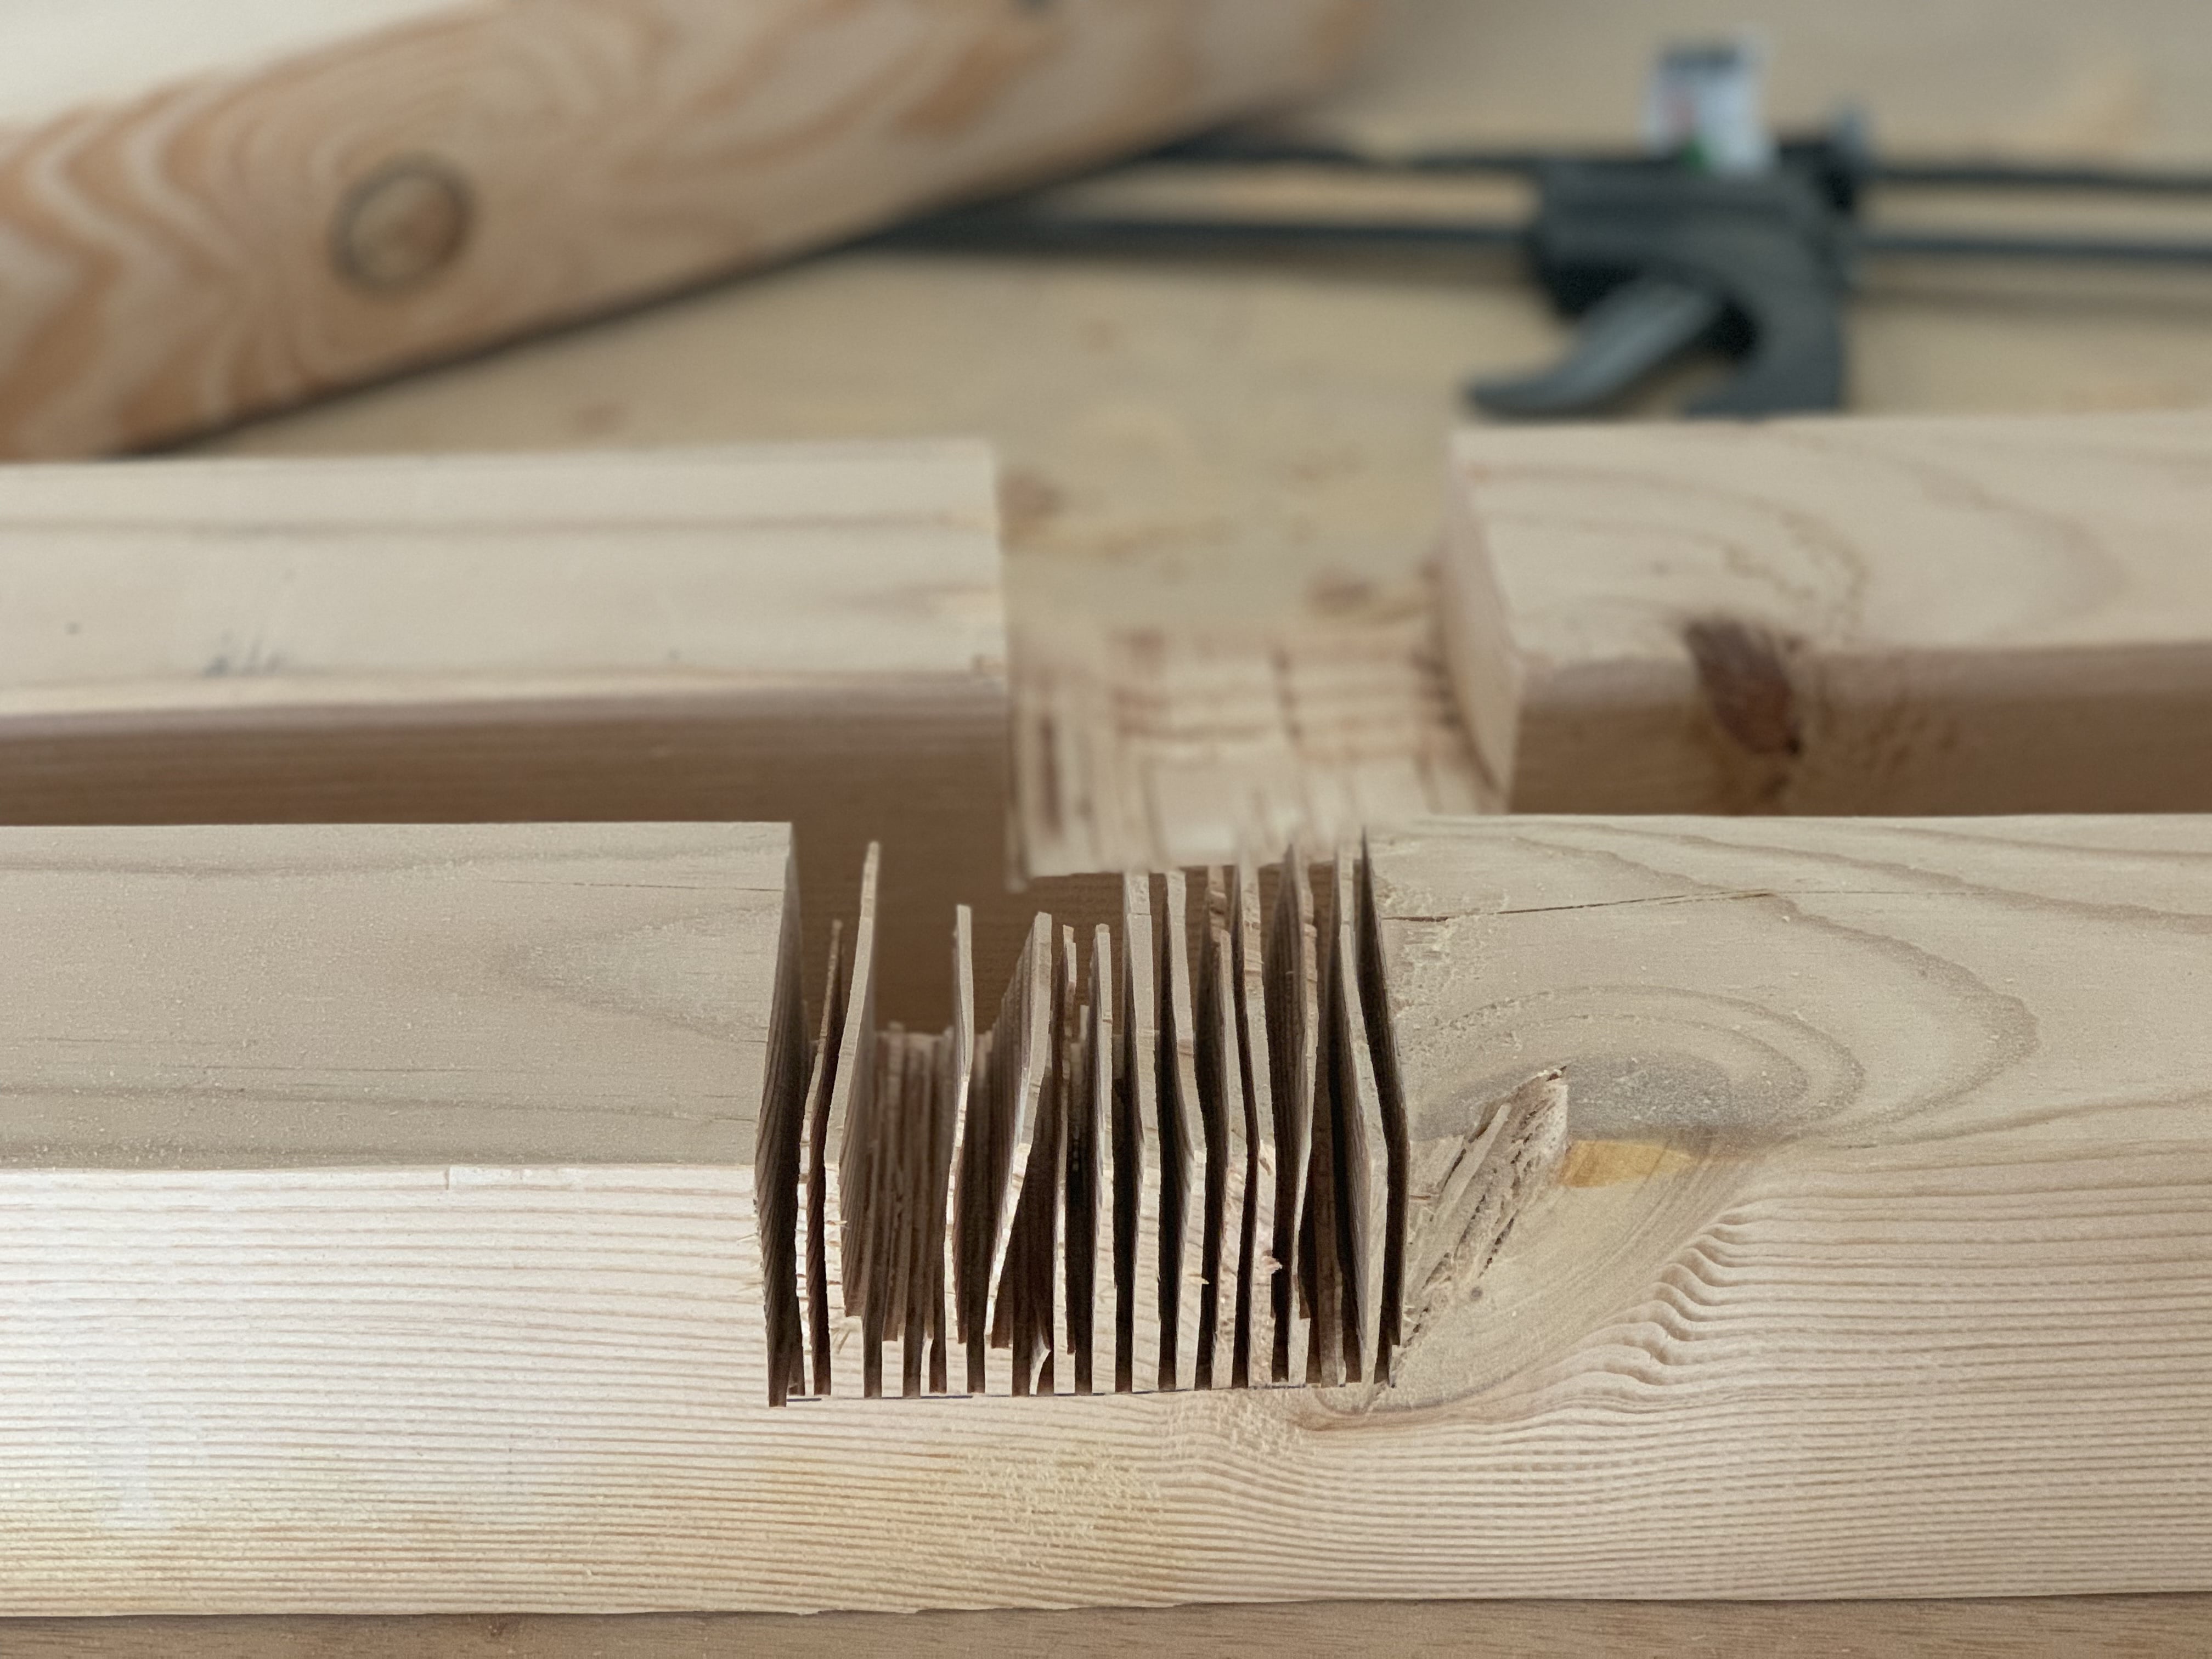
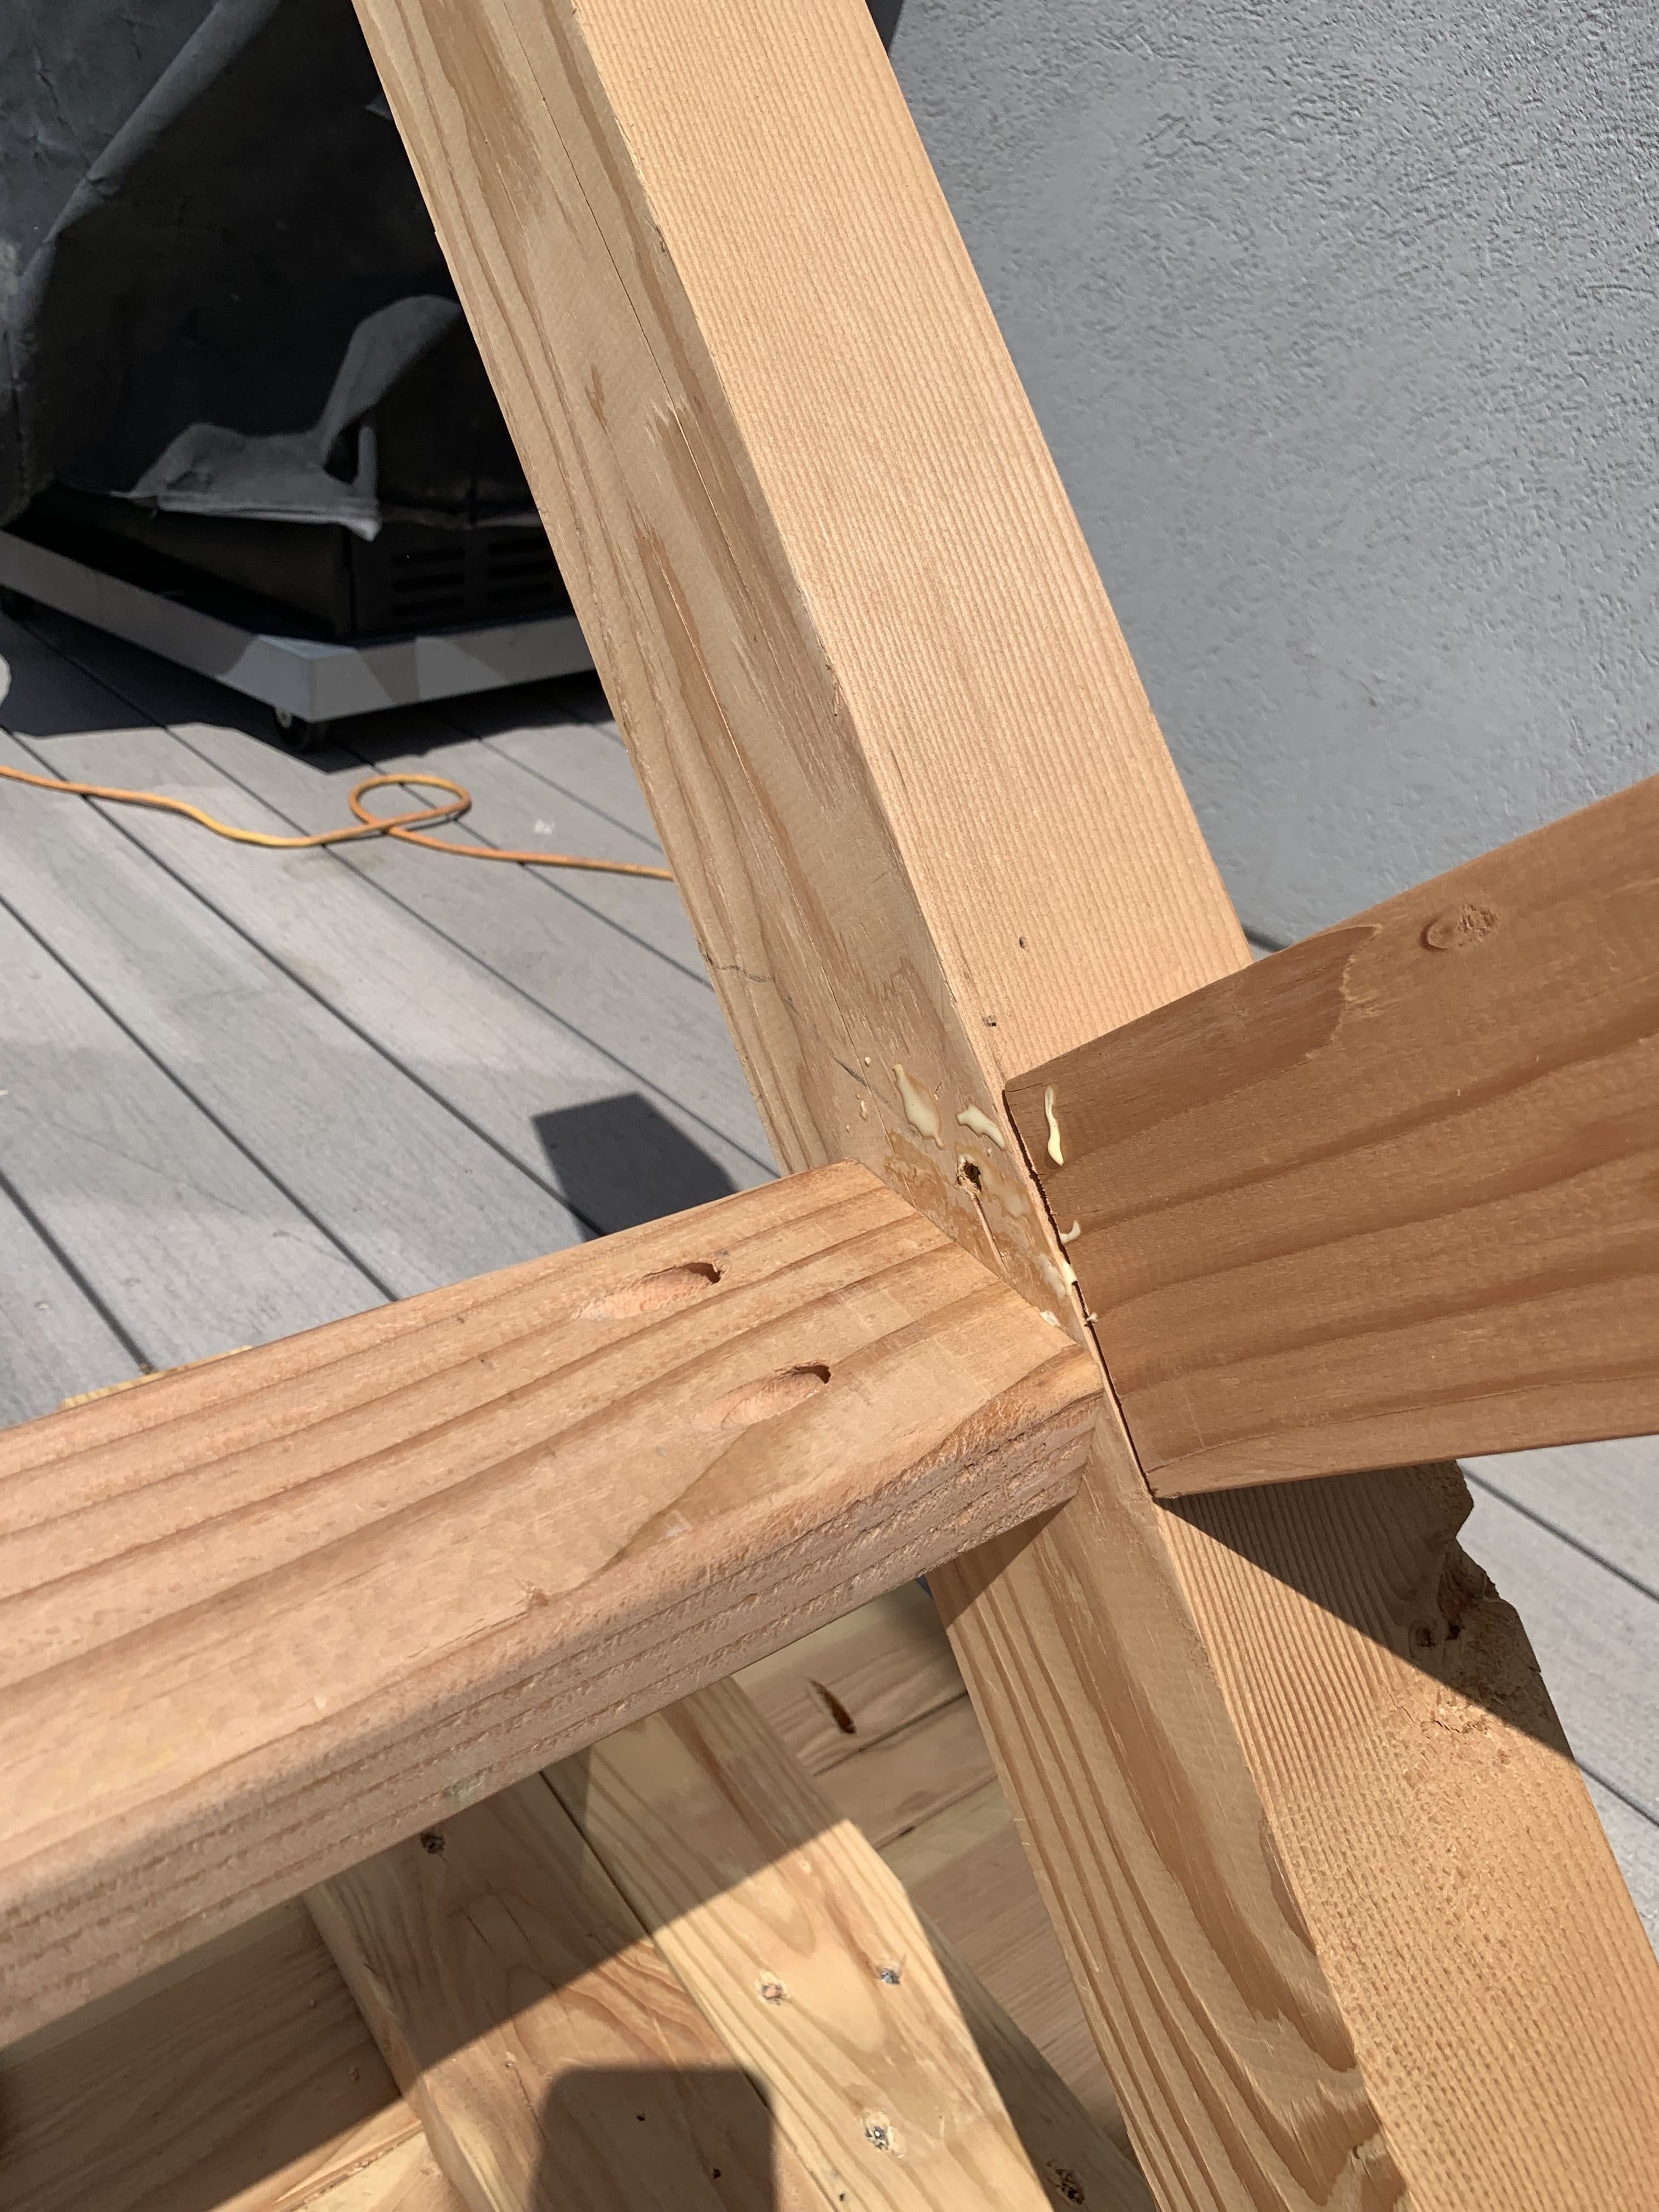
When you make a notch, you have to make a bunch of side by side cuts like this. You can use a circular saw but I prefer my trusty miter saw. Then you use a chisel and/or a Dremel/Sawzall to get all the wood out.
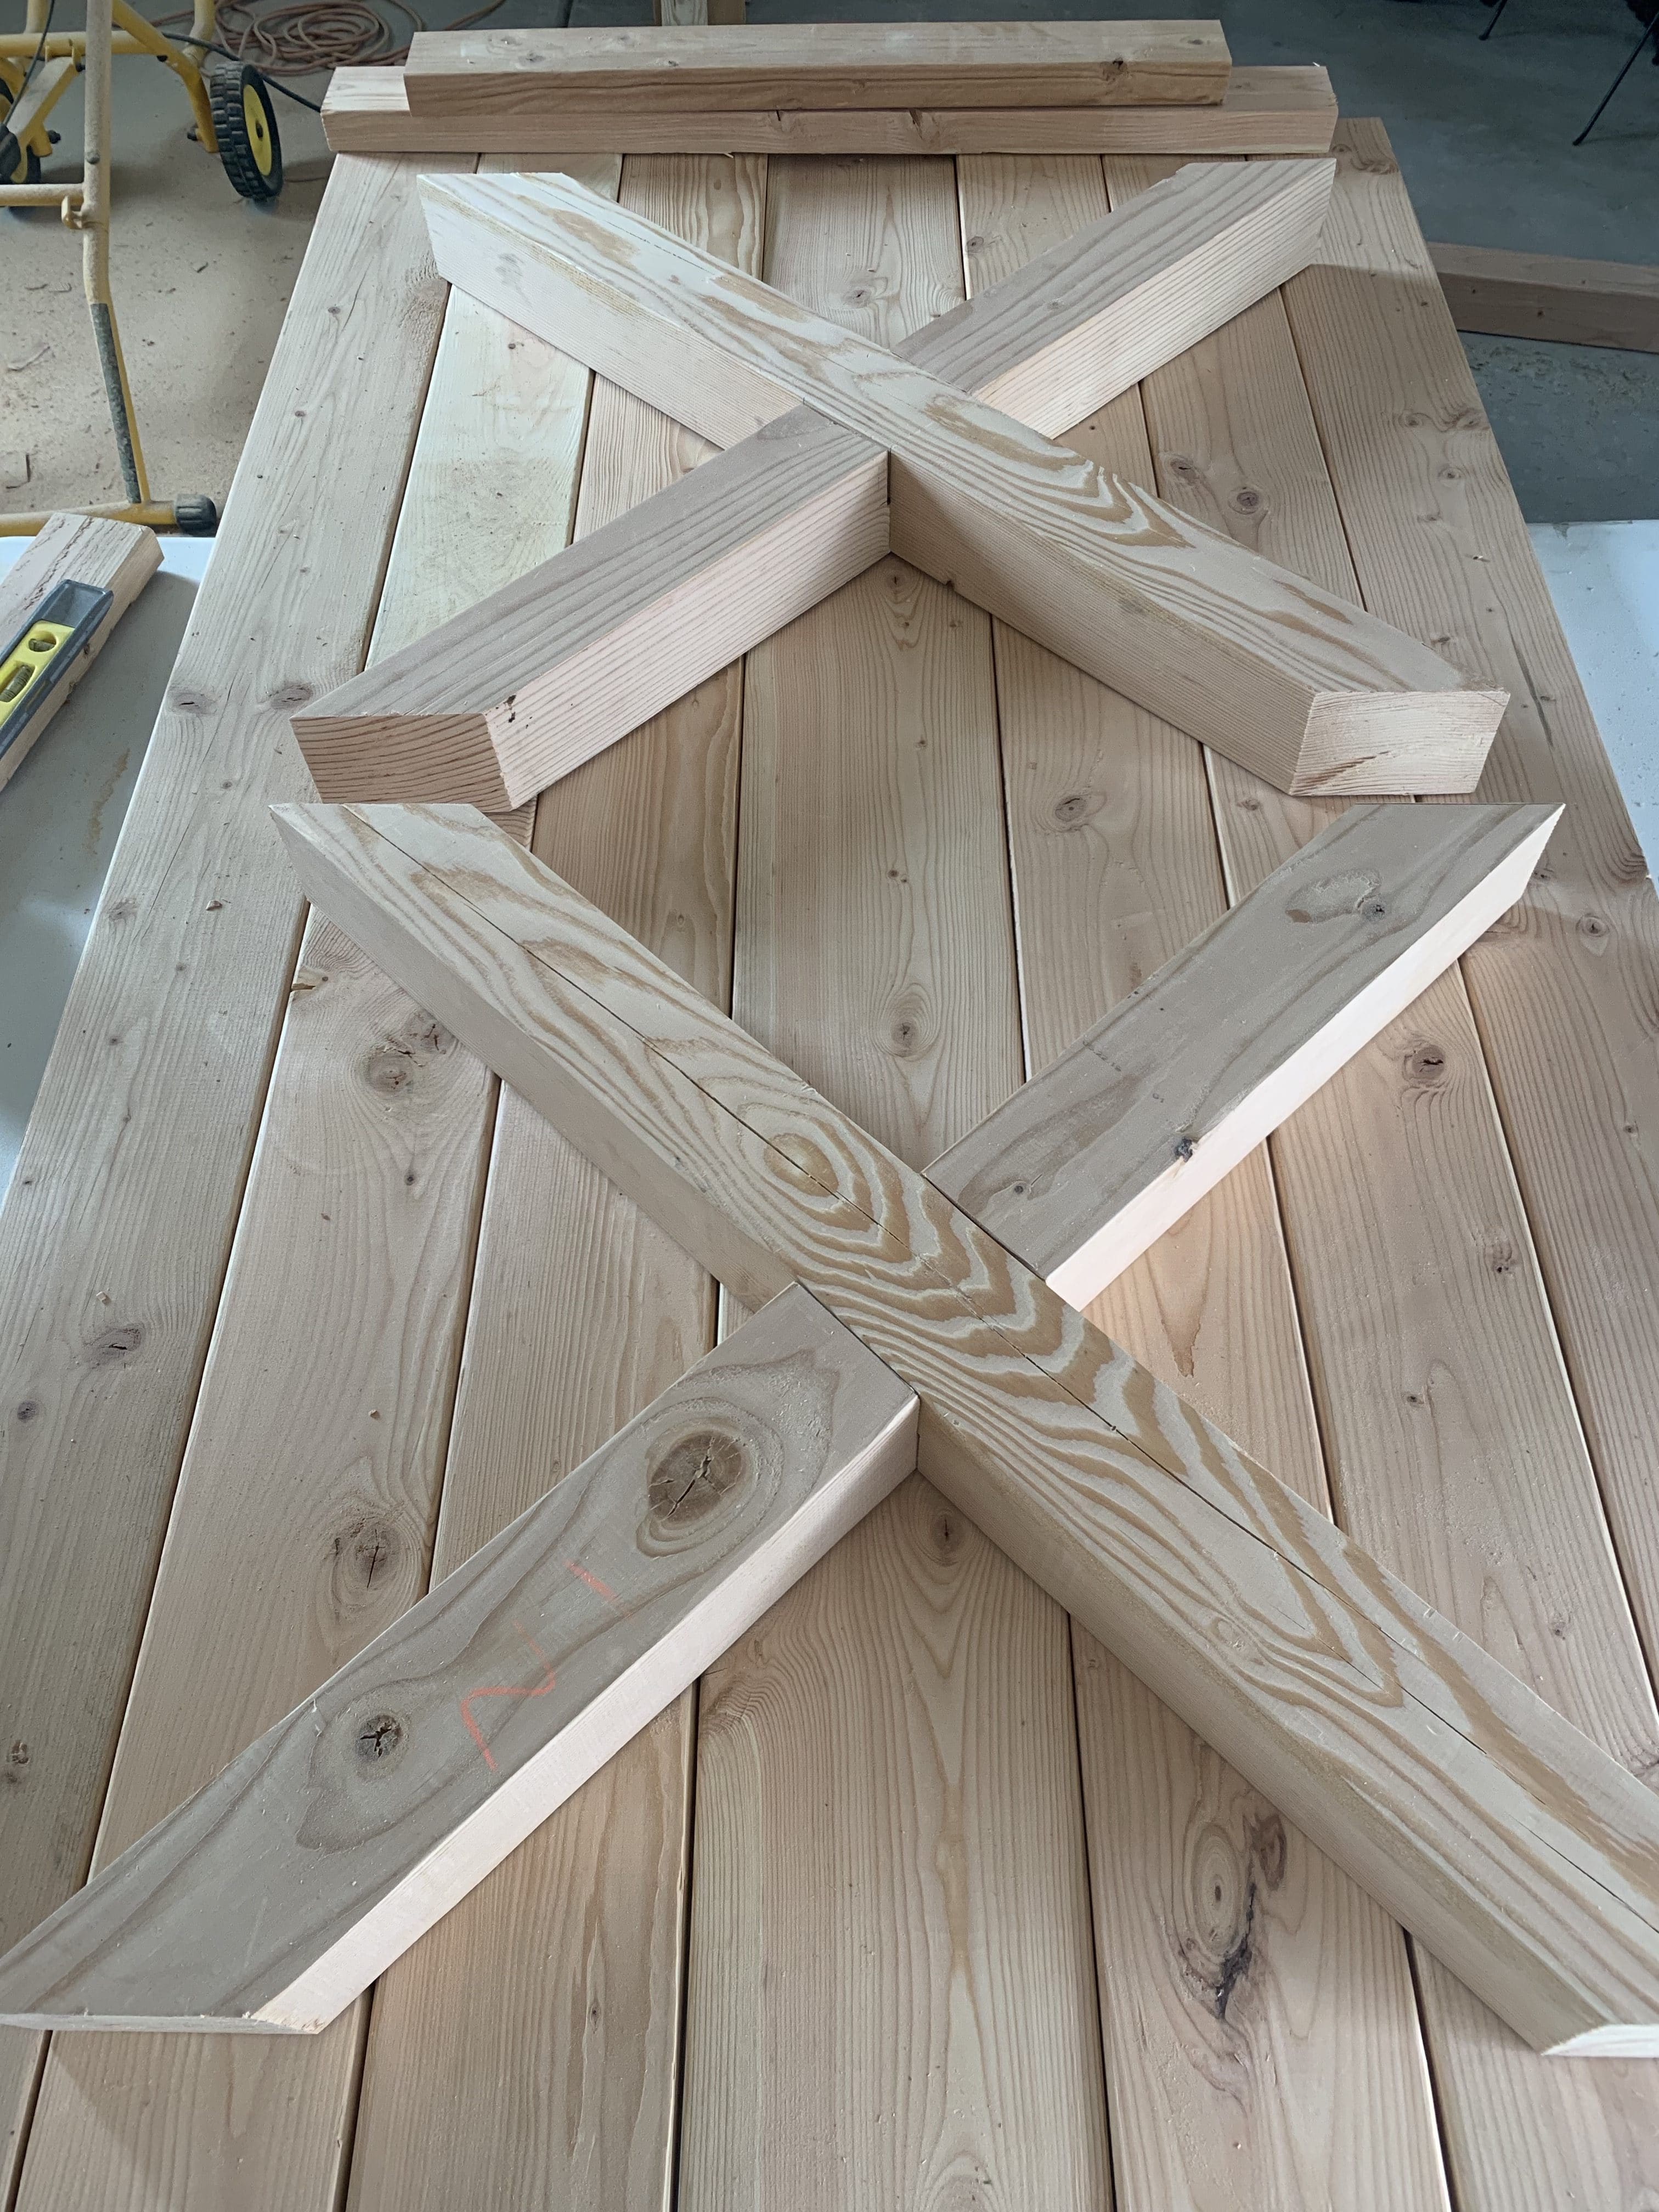
Put the notches together and you have an X! Secure them together with wood glue and screws.
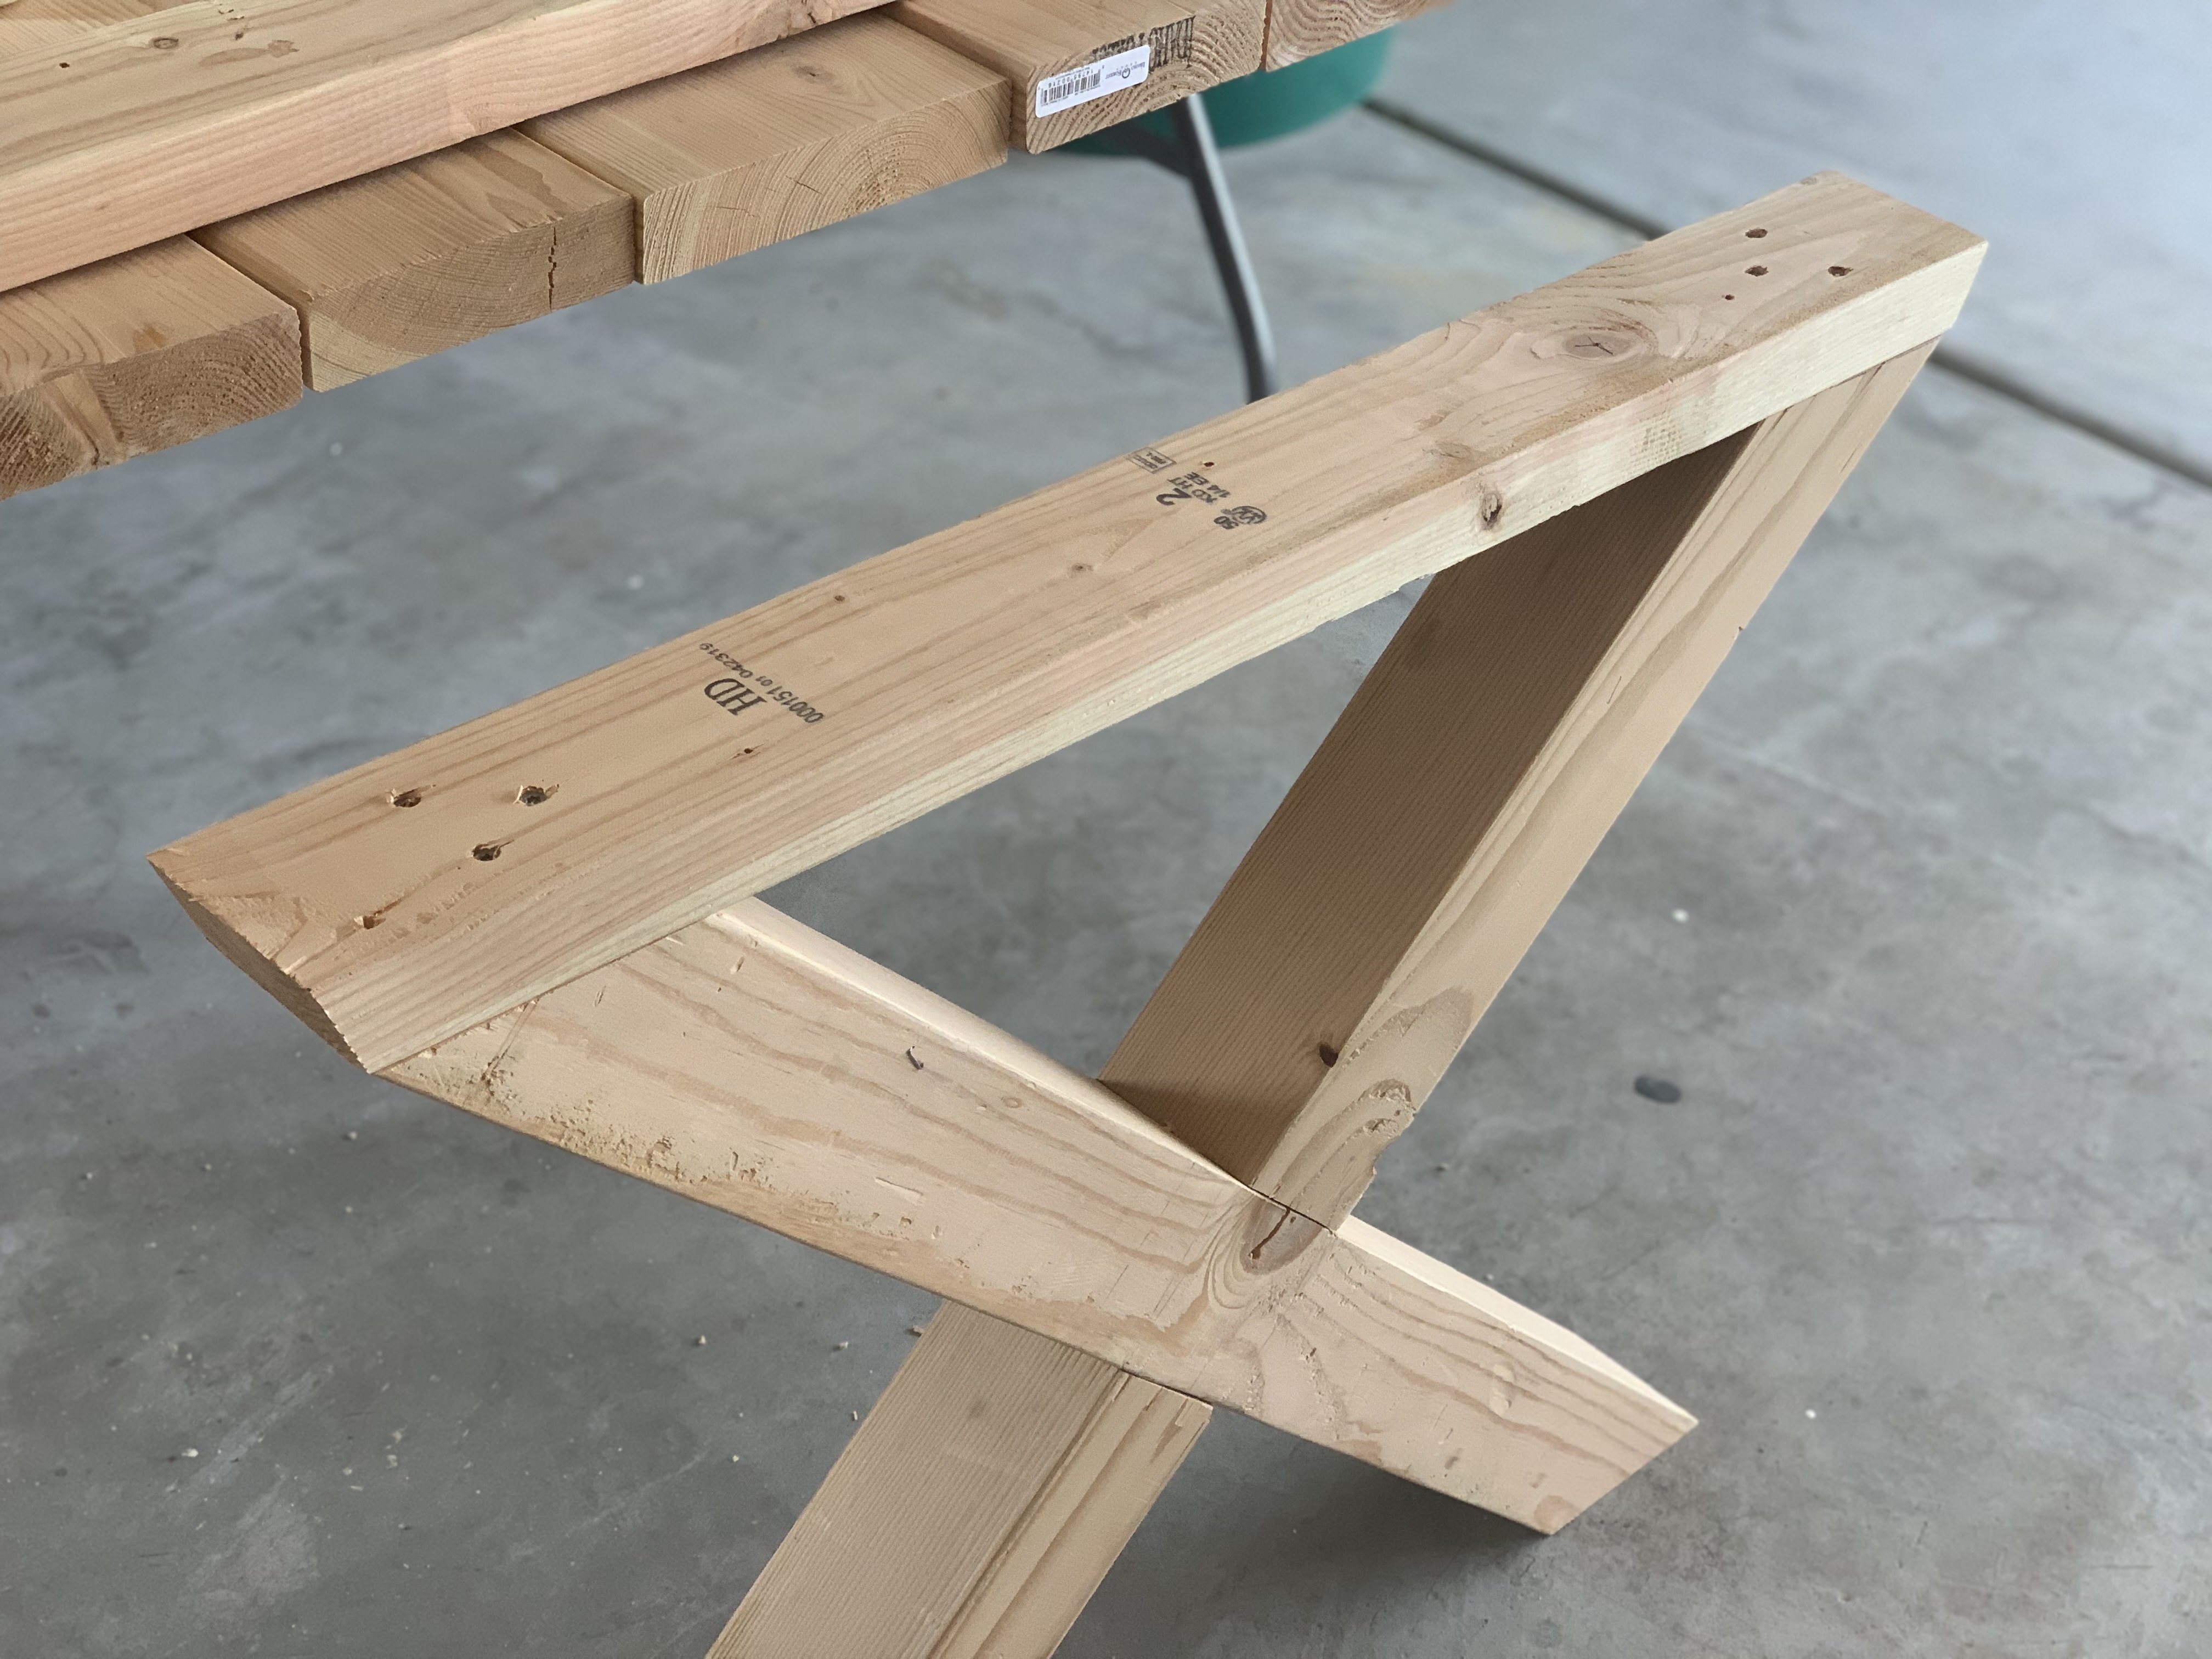
I topped them off with a 2×4 with the ends trimmed on an angle just so it wasn’t so boxy but you could totally skip this step. I screwed them into place with 3 2 1/2″ wood screws.
Attaching the Legs to the Tabletop
Originally the legs were steadied by a trestle made from a pipe. The pipe was an odd width and I used a 1″ spade bit to bore holes in the leg bases. This ended up being too big and the pipe never fit snugly and basically couldn’t be used as a trestle. The table was terribly wobbly. It seemed a bit weak next to the chunky 4×4 legs anyway. I changed up the plans.
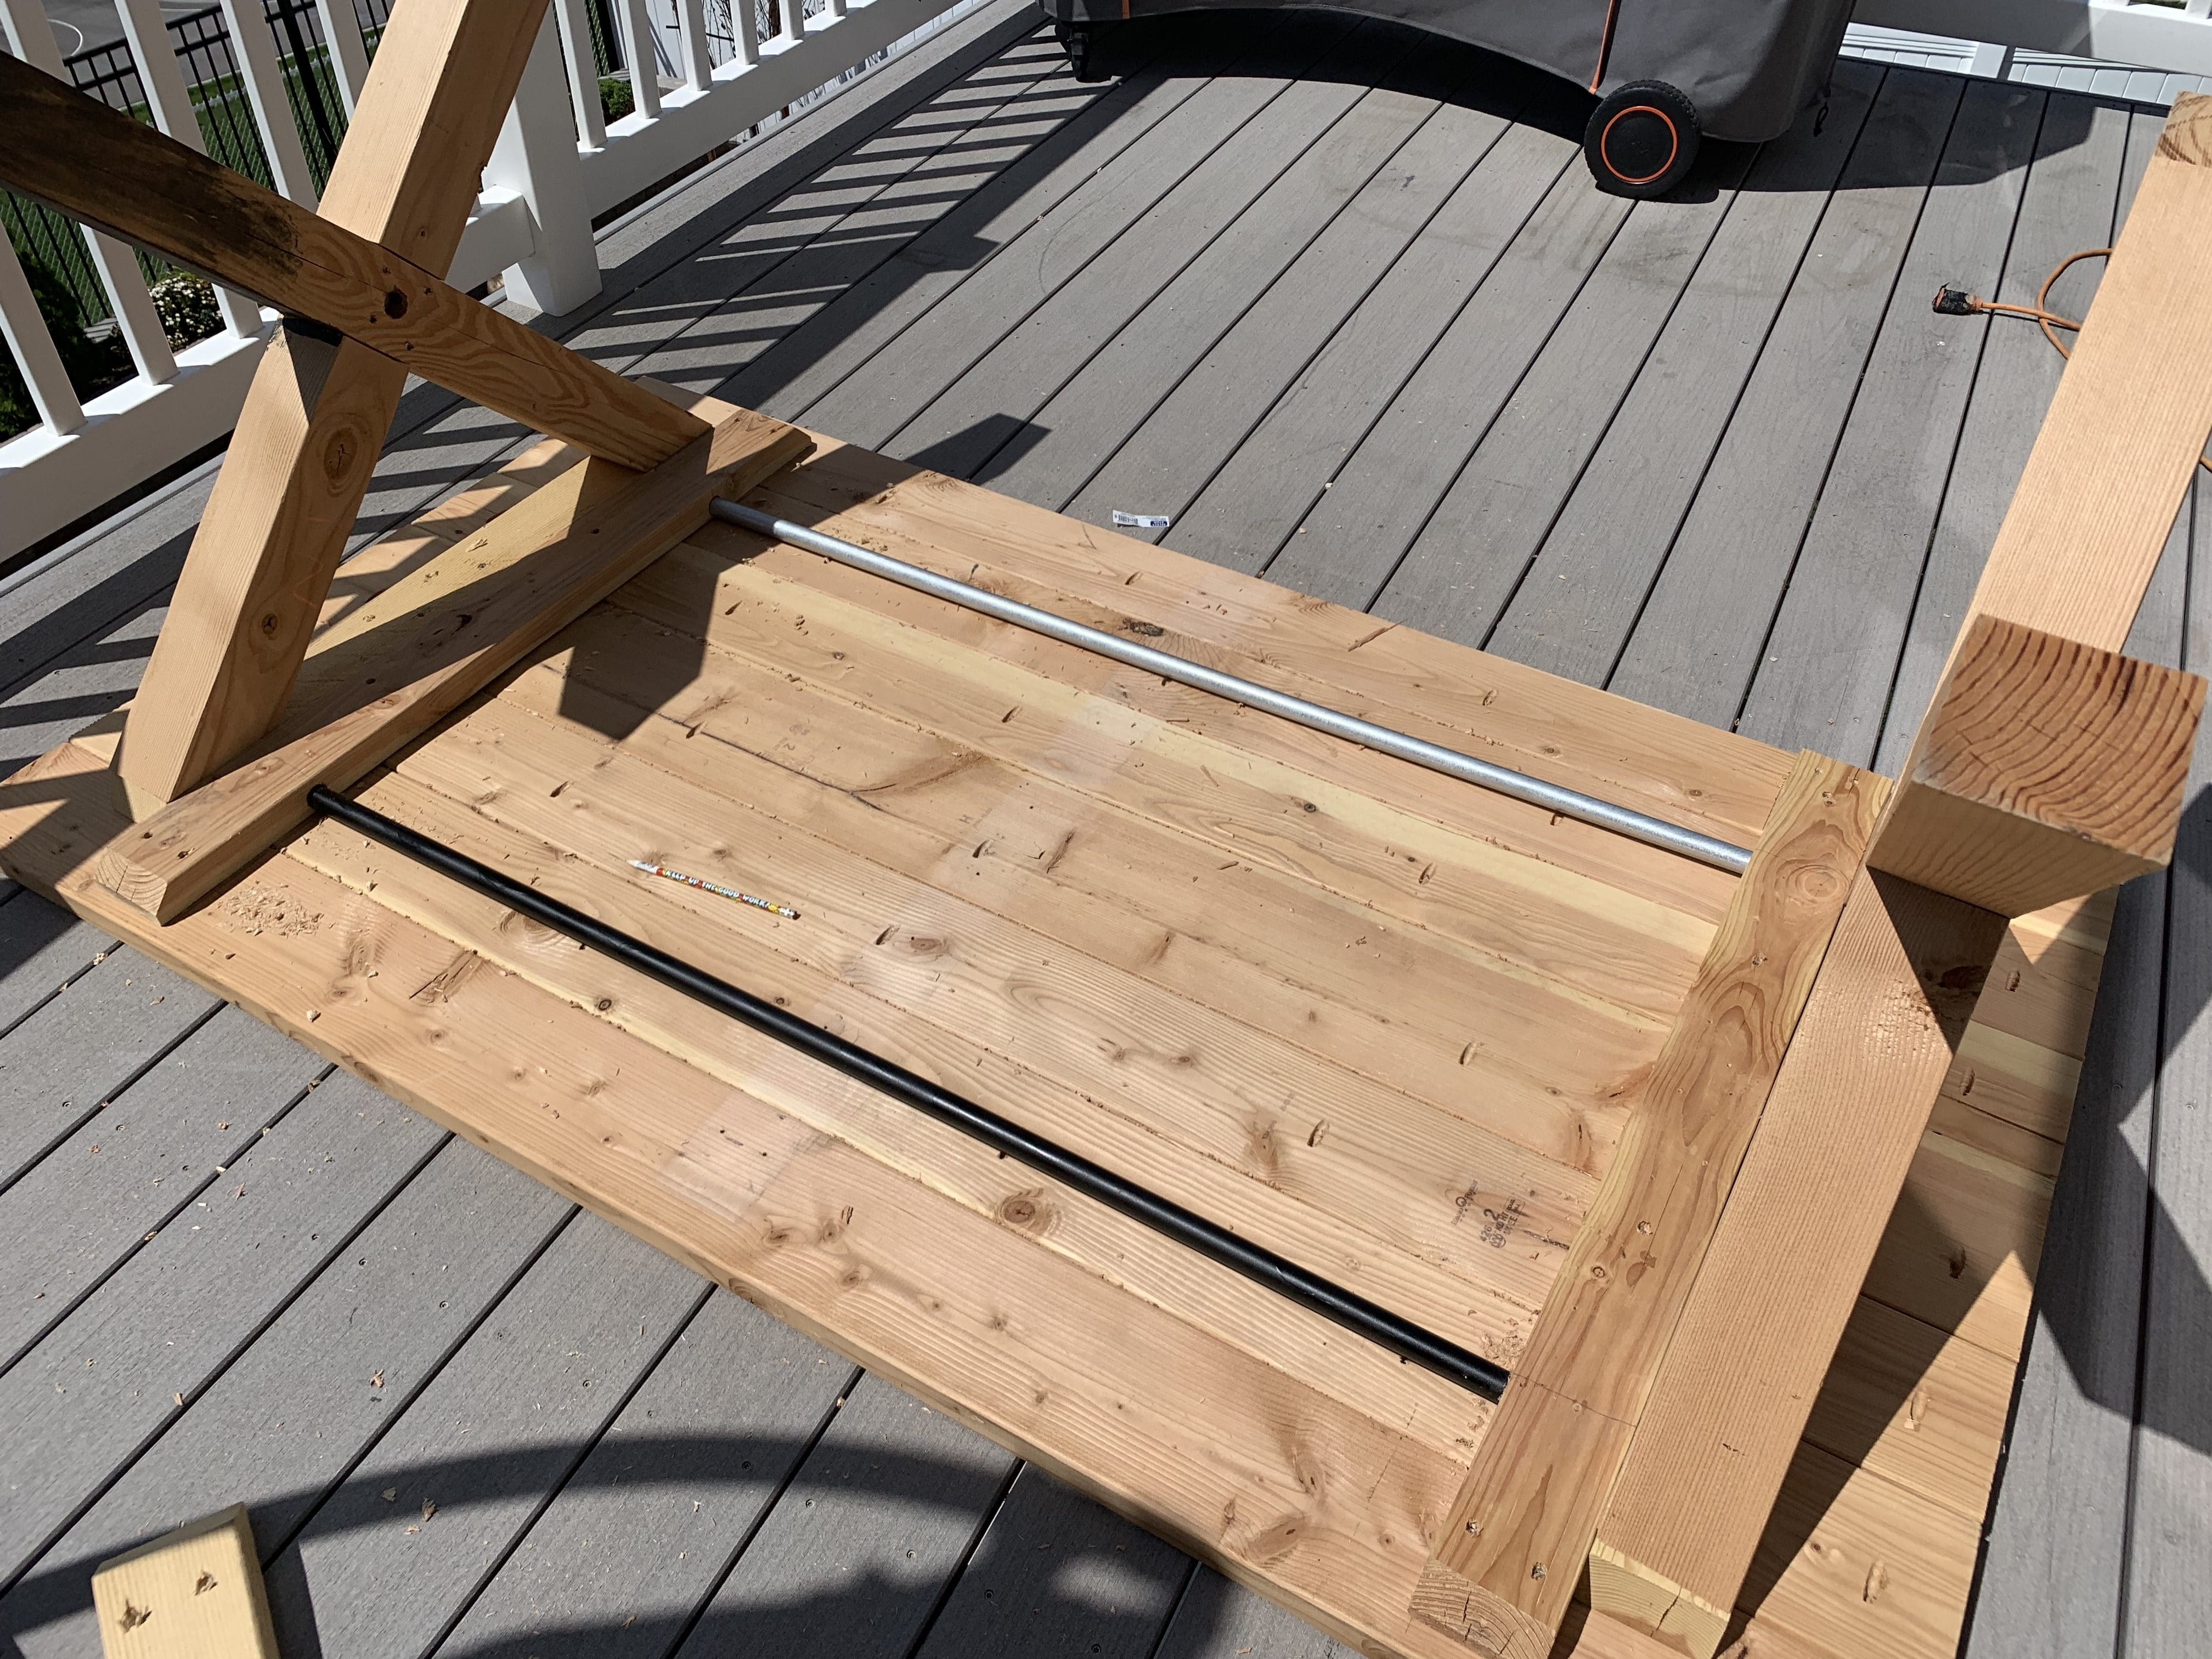
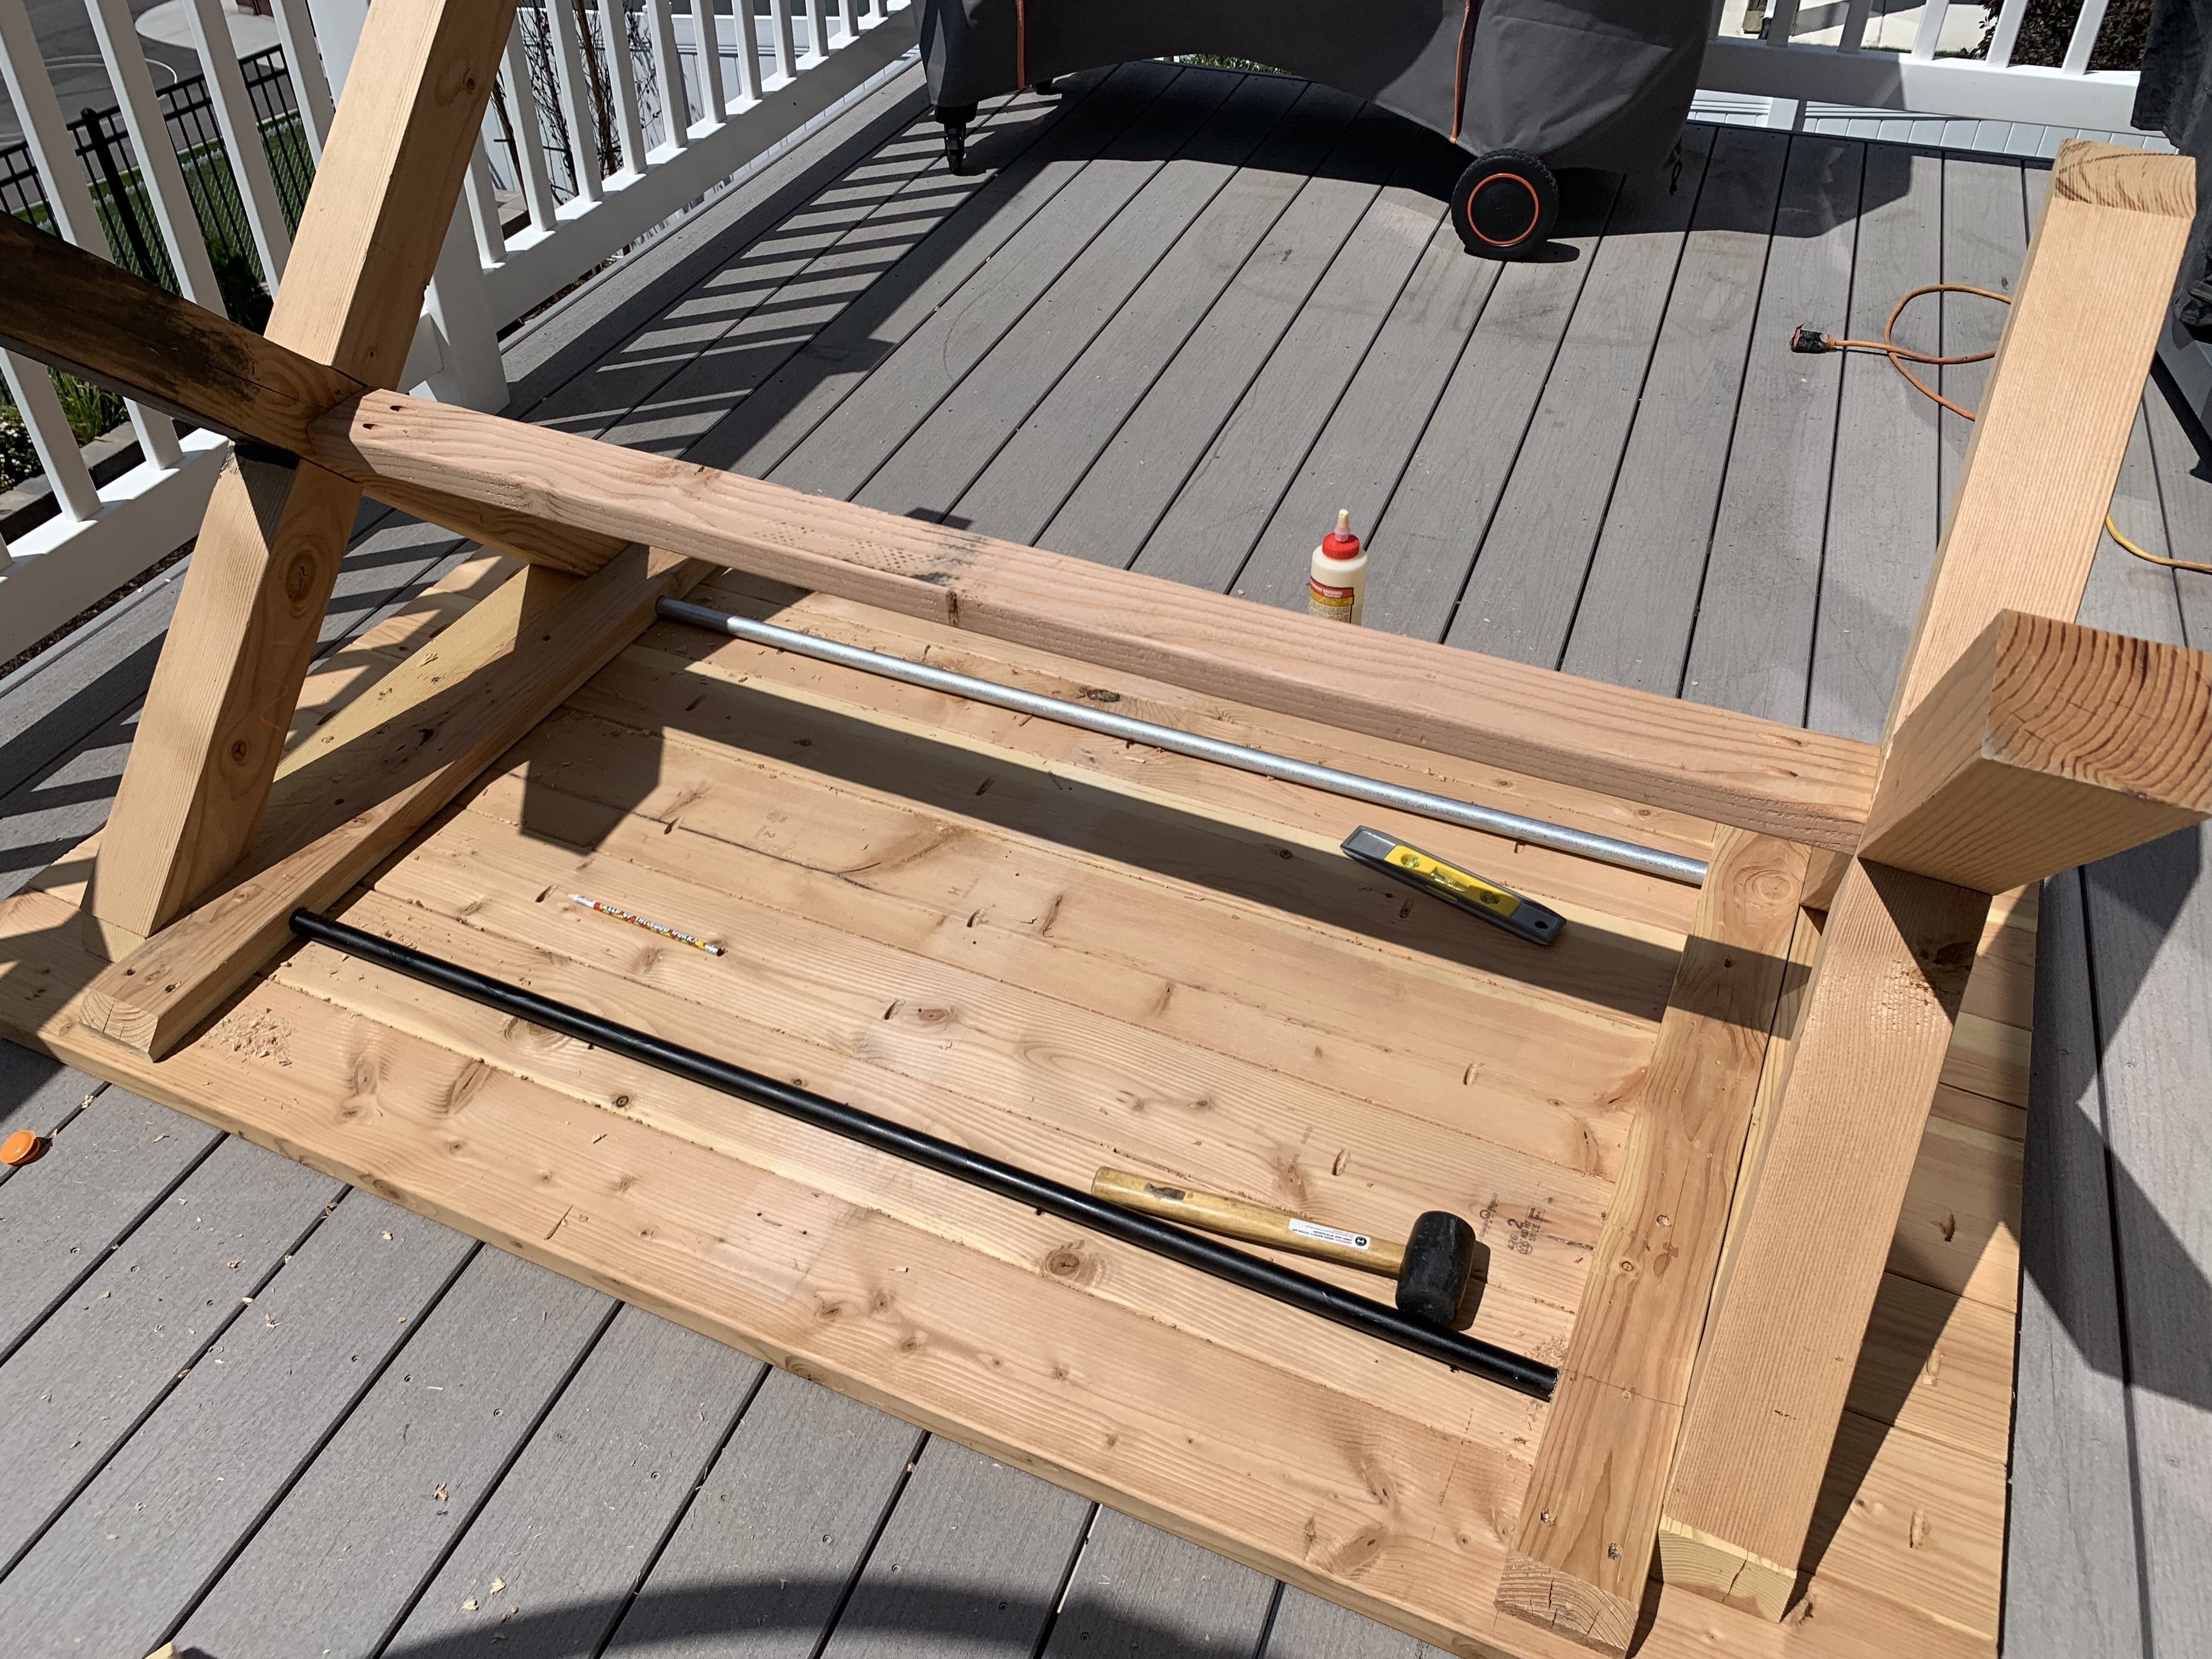
I took the pipes I had and built this framework using some 2x4s. I drilled holes in the 2x4s using a 15/16th spade bit. I used some Gorilla super glue and put the pipes in the holes. Then I used a mallet to bang the framework into place so it was definitely snug. I also screwed the 2×4’s into the tabletop with 2 1/2″ outdoor screws.
This added a lot of stability to the table but you could easily make this framework using 2x4s and pocket holes rather than pipe. I just wanted to use the pipe because I had bought it and didn’t have extra 2×4. (One of the pipes is black because I had originally spray painted it to be the trestle.)
The final step was to make the trestle, which I did out of a 2×4 and pocket holes. It was a good fit and once that was in place, that was a good, solid table. No wobbling at all!
Let this X-leg outdoor table project just go to show you that fairly experienced builders (I’m actually not comfortable calling myself experienced but I also wouldn’t consider myself a beginner) make mistakes. The key is to not be satisfied with mediocrity and learn to get creative with what you have to fix the problem. I’m happy I fixed the wobbling issue, even though this project ended up being a bigger pain than I wanted it to be.
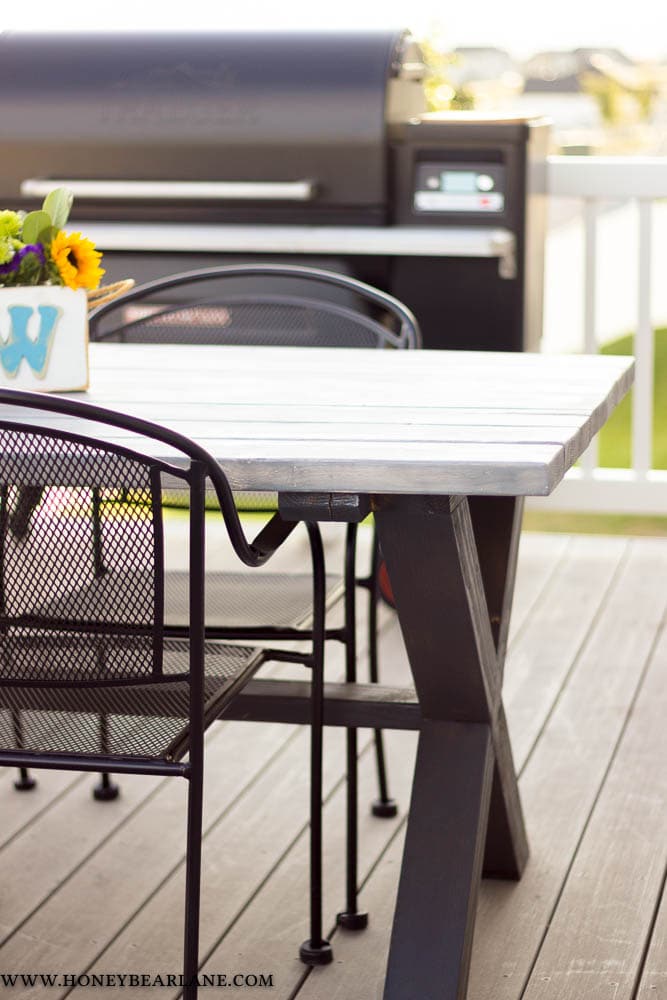
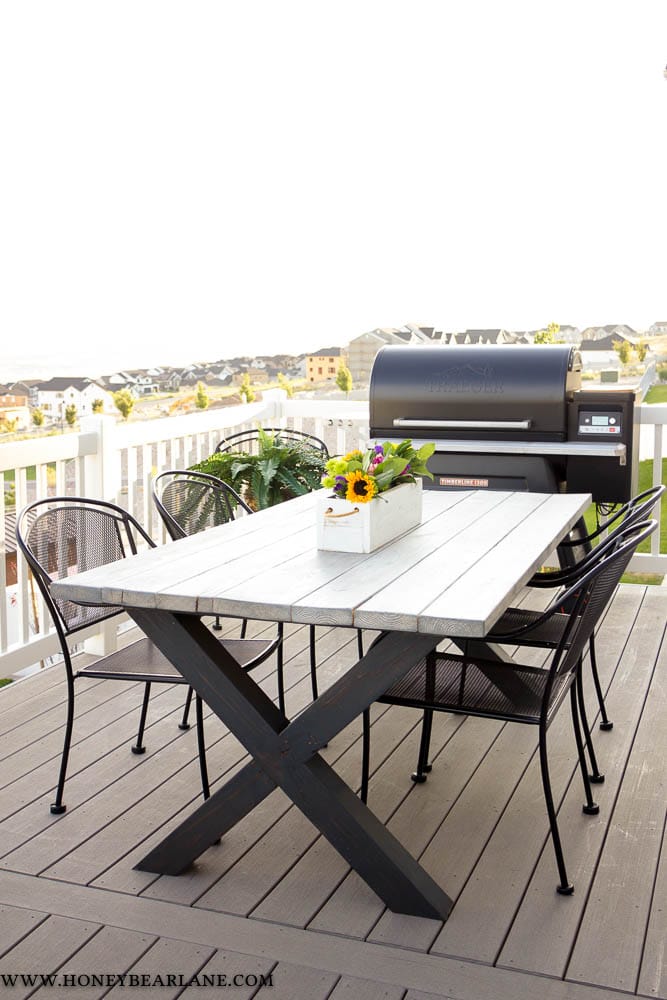
I finished the table by staining the legs with Rustoleum Carbon Gray which matches my outdoor couches I built. I wanted something a little lighter for the top so I tried my weathered wood method but used the something something instead of Minwax Dark Walnut as I usually do. It resulted it a very gray weathered wood effect which I actually didn’t love. I added one more coat of whitewash over the top and let it be. Then I finished the entire table with Thompson’s Outdoor Sealer. I’m planning on putting a tarp over the top of the table when winter comes so I can protect the table for as long as possible. The elements are harsh where we live!
I LOVE my x-leg outdoor table. It’s so fun to have a place to sit and eat and enjoy each other’s company in the evening, admiring the view and feeling the breeze. I just need to get a citronella candle to keep the mosquitoes away. My husband bought a Traeger this year and we love cooking on it and entertaining people. So that was an extra incentive to finish the table and set up the entire deck as a beautiful and relaxing social space. We’ve already used it several times and will use it even more as the weather cools down a bit.
We have plans to replace the railing with black wrought iron, put in stairs going to the backyard, and ultimately a nice pergola above for some shade. All that is money money money of course, so that won’t happen for awhile. I can’t wait for the weather to turn a big cooler and the sun to set a bit earlier because then we’ll be able to have some really nice dinners outside. And after dinner we can sit on the couches around the fire pit and chat and roast s’mores. My parents are moving to Japan in a few weeks so we will have to have them over!



most people would complain about the checking and warping of the top but I absolutely love the look of it HOME RUN!!!!
Thanks! I definitely think weather can take it’s toll but I’m going to put a tarp over it during the winter so hopefully that will help some!
Hello, what are the angles on the 4x4s ? Is it 45• ?
I don’t exactly remember but they do look like 45 degrees. Check the link from Rogue Engineer, since those were the leg plans I used.
I just finished this table with a few modifications , I used the Kreg jig to cut the pocket holes and exterior wood glue and a pony clamp to draw the 2X `s together making a tight fit. I used a 2 X 4 to bridge the gap between the X legs and a 2 X 4 on top of the X legs to secure it to the top which makes for a very secure table and cut a hole for an umbrella. I also made the top as a full 96″ and cut both ends to make it 7 2″ I think that this makes for a very clean finished end. I am still trying to figure out how to finish the table stain or paint.
That sounds great!