Make Show-Stopping Holiday Cupcakes!
CUPCAKES!
Cupcakes have been ragin’ for awhile now. But they are still hot because they are so good! Like the perfect serving size of cake.
I made these cuties for my {Peppermint Cupcake Tower} And Tam requested I do a tutorial for them, but I as I thought about how I made them, it was basically just playing with fondant. There’s not much of a method. But if you need a push, {this tutorial by Pioneer Woman} is a good place to start.
I’ve actually only used fondant twice. The first time I made it myself, using this tutorial. It was pretty easy, made a lot, and was super cheap. But you can also buy it pre-made by Wilton in a smallish box. They even have pre-colored fondants, which would be nice if you wanted to use those exact colors. But I like to dye my own because I can get more colors and in the right amount. Sometimes you only need a tiny bit of black and a whole ton of red.
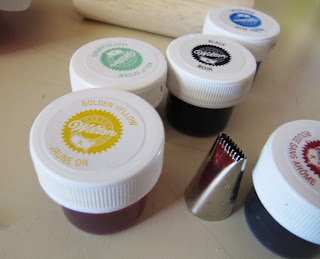
To dye fondant, use Wilton dyes. They come in these little cylinders, are pretty inexpensive, and last forever. And they are much more effective at dying than traditional food coloring.
To dye, just dip a toothpick in the dye and wipe it on the fondant. You need a good amount for deep colors, so just keep dipping and wiping (wiping is a gross word to me…it reminds me too much of…other stuff.) Then knead the fondant. And knead and knead and knead some more. It will be marbled for a long time but just perservere, it will all blend after awhile. If it gets sticky, use cornstarch to un-sticky it.
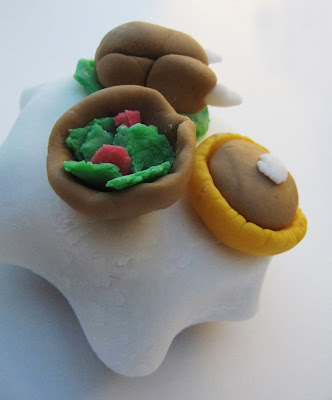
Roll it out (put some cornstarch underneath) and then you can cut out shapes for decorating. {Make it & Love it has a great Make-a-Cake series} that teaches you a lot better how to make things with fondant. I did some more for Thanksgiving. Aren’t they cute? I gave my son the little fondant roasted turkey and he ate it and said, ‘I need more chicken!’
Clearly I am not a fondant expert, but the point is that anyone can do it, and it’s literally as easy as playing with playdough. So try it! Try it with your kids! When your fondant starts to dry, just knead it a little to get it pliable again. To get it to stick to stuff again, just add a tiny bit of water. To un-stick, cornstarch. Easy peasy.
Are you disappointed? Did you want a real play-by-play? Well get a load of these babies I made the other day:
 |
| That one little cherry keeps trying to escape… |
These are the perfect pie alternative for Thanksgiving. Not everyone likes pie…(and they are crazy, but that’s neither here nor there.) So here is a happy medium. Unless you are like my husband and don’t like pie or cupcakes…well I have a yummy key lime pie recipe for you, later.
And here’s the kicker…they are extremely easy to make. You just need some basic piping skills.
First make the buttercream frosting. Here is my favorite recipe:
Buttercream Frosting for Piping
- 1 cup pure white Crisco
- Half a bag (2-4 cups) of powdered sugar
- 1 teaspoon of vanilla
- 2 tablespoons of water
Cream the crisco, water, and vanilla. Then slowly add the sugar until you get the stiffness you want. Don’t make it too stiff or it won’t pipe well. If it’s too stiff, add a tiny bit of water. If it’s not stiff enough, add more sugar. I double this recipe!
Pumpkin Pie Cupcake
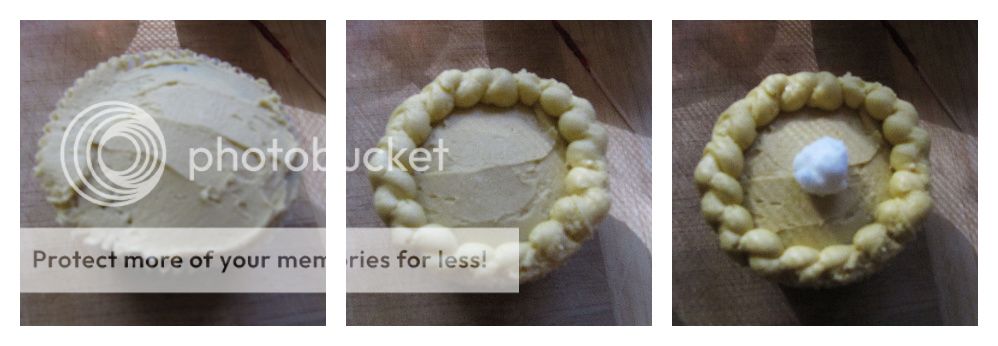
Color half of the frosting a light yellowy-brown color for the ‘crust’ and the other half a deeper orangey-brown for the ‘pumpkin’. Save a small amount of your frosting in plain white. Fill a piping bag with the crust colored one and use a plain open circle tip (#12 I think.)
Frost the cupcake with a knife in the pumpkin pie color. Then pipe on your crust, pressing gently down and lifting slightly around the whole cupcake. Then (I just used my hand) to put a small dollop of white frosting in the middle for the whipped cream.
Cherry/Apple Pie
Divide your ‘crust’ colored frosting and put them in two different piping bags. Use the same tip as you did for the pumpkin pie for one bag, and the basket weave piping tip for the other (#47 I think.)
When you bake the cupcakes, fill the cupcake liners with less batter than normal, so there is still room in the liner after the cupcake is baked. Then spoon a little bit of cherry or apple pie filling into the liner. Just a little, you don’t want the liner to overflow…then it will be a sticky mess.
Allow your pie filling to set up by refrigerating it for awhile, and then pipe on a lattice pie crust top (the criss-cross part) with your basket weave frosting bag. After that, pipe on the surrounding crust part. Make sure to make these only a few hours before they will be eaten because the pie filling will really soggy up the cupcake (another reason to not use a lot.) You can also try this method on mini-cheesecakes!
(Umm, there are no pictures of this method, sorry. On a completely unrelated note, DONT try to substitute the cherry filling with fondant balls with dyed piping gel. Piping gel is NASTY to eat. That is, unless you need to make these for picture purposes and don’t have cherry pie filling handy.)
Happy Cupcakes-giving!!


adorable!
I've always heard fondant isn't that yummy either. I would think it mostly tastes like sugar…
I love the little Thanksgiving table cupcake! The table cloth adds a nice touch too! 🙂
super super cute!
Those are fabulous cupcakes. I don't like the taste of fondant but you could just peel off the top before eating it. They look *amazing* though. Great job. I totally want to try them.
These are so cute! I love the one with the plate of cookies. Stopping by from TT&J's link party.
I love these and I'm featuring on my cupcake blog on Friday!
http://cutecupcakesallthetime.blogspot.com/