Sharing is caring!
Hello ladies! I hope you have a great 4th of July. After a big holiday my kids and I always go through a post-holiday funk. Cousins are gone, fireworks are over, and laundry seems to be coming out of the woodwork…post-holiday funks are the worst! In an effort to ease the real-life reality I’ve got a fun and simple recipe to share with you today. A little chocolate goes a long way, doesn’t it?
I scoured the internet for the perfect fudge pop recipe. My pinterest boards are filled with ones that I’ve tried. Pudding, Cool Whip, cream, marshmallow fluff, and a slew of other ingredients made there way on to the recipes lists. I was bound and determined to find the best fudge pop for you. After trying four different recipes I’ve brought you the best. I’m pleased to announce that simplicity won. I love using natural ingredients that I have on hand and that is just what this recipe delivers. I promise you’ll have everything in your pantry for these. The flavor and texture of these are amazing. They are fun for kids and you’ll enjoy snacking on them too.
Fudge Pops
Slightly Adapted from
Brown Eyed Baker1/4 cup semisweet chocolate chips2/3 cup sugar
2 tablespoons cornstarch
3 tablespoons unsweetened dark cocoa powder
2 1/2 cups whole milk
1 teaspoon vanilla extract
Popsicle molds or 3 ounce cups, wooden popsicle sticks, and aluminum foilCombine the chocolate chips, sugar, cornstarch, cocoa powder, and milk in a medium saucepan over medium heat. Stir frequently and let the mixture cook until the chocolate chips melt. Let the mixture cook until slightly thickened and well combined, about 10 minutes.Let the mixture cool for 10 minutes and then pour it into your popsicle molds. If you you don’t have popsicle molds place 9 cups in the the bottom of a round cake pan. Evenly distribute the chocolate mixture between the cups. Place a piece of aluminum foil over the top of the cups and press down slightly so that you can see the top of the cups. Poke a wooden popsicle stick through the foil near the center of each cup and let the foil hold the stick up. Freeze completely (overnight) before serving.
To serve, run the popsicle mold or cup under hot water until the fudge pop comes free.
Notes:You might notice the “layered” look of the pops pictured. This was my third time making them and of course, they didn’t turn out for the pictures. I didn’t let the mixture heat and thicken long enough and so things settled and separated when put in the freezer. They still tasted great, and yours will all be one beautiful chocolaty color.
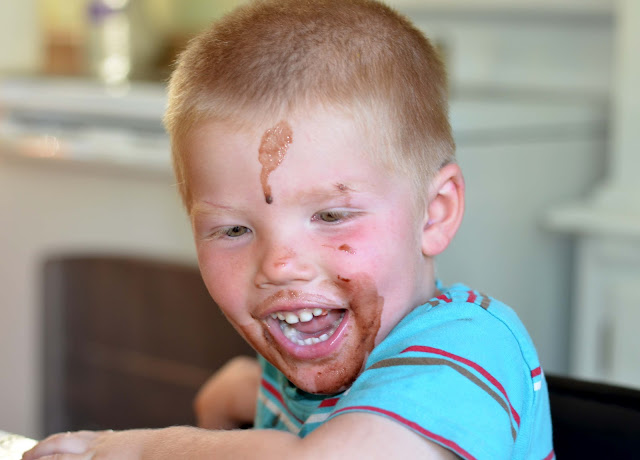
These are messy. Be warned and arm yourself with a wet rag or just have the babies eat them outside.
I would LOVE for you to stop by and say hi. I’m Melissa and I’m blogging over at Bless This Mess.
I’m newer to blogging, but am in love with the whole thing. We are living in a train-wreck of a house while remodeling, I just finished an 8.5 month stint of washing dishes in a bucket for my family of 5 and acquired my first brood of backyard chickens. I share amazing things we’ve found in the walls of our house, my favorite recipes, furniture re-dos, and my thoughts on life. I love meeting new people, so introduce yourself 🙂
Heidi- Thanks for having me. I’m super excited to be here and have already started planning my future recipes to share 🙂
Proof of the popsicle mess:


Melissa, these fudge pops look great! Must try this recipe out for my son since he didn’t care for the fruit juice pops that I made a week ago. Thanks for sharing and have am awesome day!
Melissa! I read through the first part and thought, “yeah right, I have nothing in my cupboards, they can’t be this easy”, and then I read the ingredients. YES! I could totally make these! What a great tutorial! I LOVE the pictures. Thank you for sharing!
I actually noticed your button on the side there the other day and have been falling in love with perusing your blog. It’s fabulous! Excited to see more of you and your recipes 🙂