How to Do a Cushion Zipper
This couch slipcover has been all sorts of adventures. I’ll give you a peek at my progress soon because I am LOOOOOVVVVIINGG it!!!!! Okay but seriously I have lived with a dingy red microfiber couch for five years and I’m so incredibly tired of microfiber AND the color. Word to the wise: Never buy a bold color couch…it’s much cheaper to redecorate with bold accessories!!!
Onto the zipper: This is seriously easy. I was slightly afraid of zippers because I’d tried to add one in a skirt a long time ago and it was a mess, but doing it for a cushion is SUPER easy. So don’t be intimidated!
Step 1
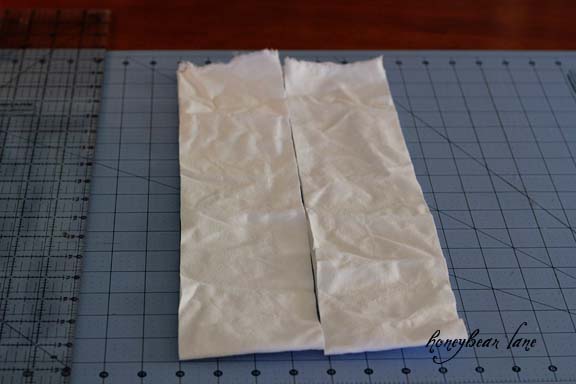
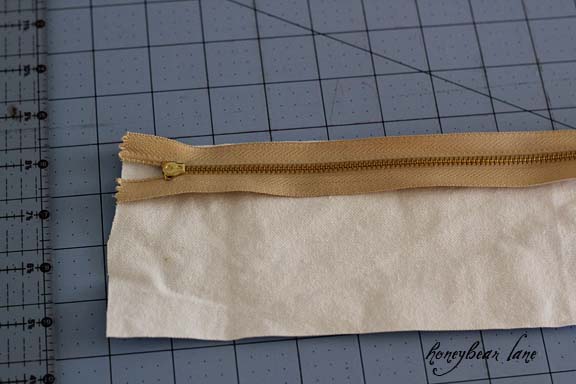
Cut out a strip of fabric the length of your zipper (mine was 30″) and the width of the cushion (mine was about 7″ including seam allowance.) Then cut the strip in half lengthwise, so you have two long strips. And yes I know the fabric is very wrinkled.
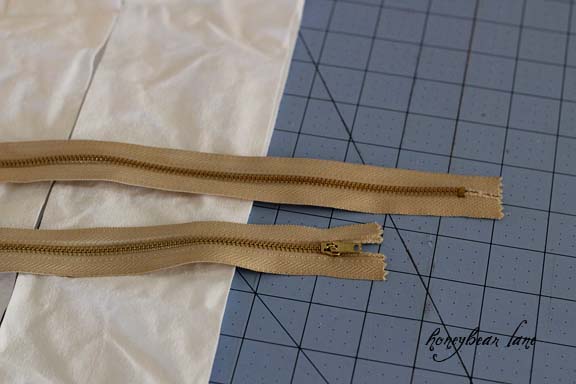 And just so you can see, this is the zipper I am using. It’s an upholstery zipper, the super heavy duty kind with sharp teeth. And don’t forget the upholstery needle if you are sewing upholstery!
Step 2
Turn your zipper over so the right side (the side with the zipper) is facing the fabric and line it up with the edge of one of the strips, right side facing the zipper. (So right sides together, get it?) You can put in a few pins if that helps you but I really never bother.
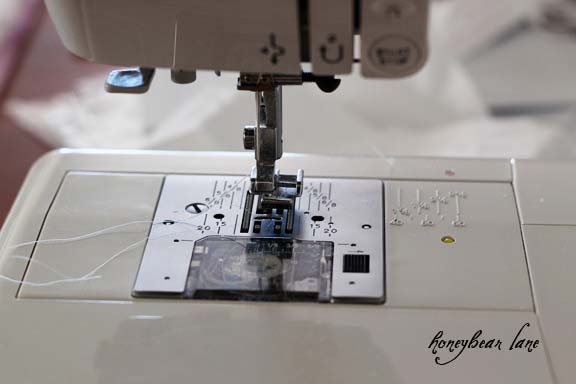 Use your zipper foot attachment. A zipper foot is a skinny little thing that lets you get the needle really close to the edge of the zipper while still gripping the fabric. You can put it on either side of your needle, but I seem to prefer sewing with the needle to the left and my needle position to the left, I think it gets the closest.
Step 3
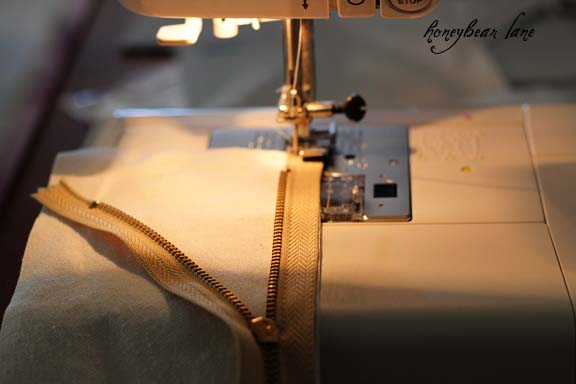
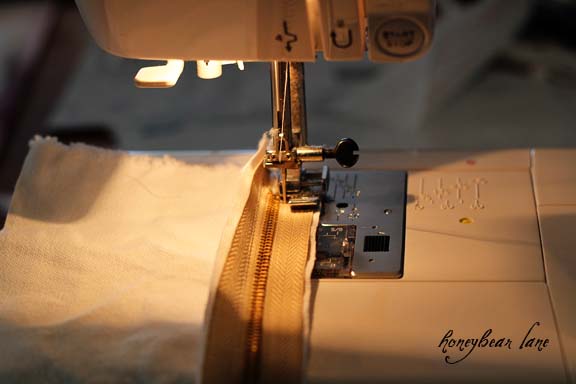
To start sewing the zipper, unzip the zipper a tad because the chunky zipper pull gets in the way. Line your needle up to the side of the teeth, but not too close because the needle won’t actually go through metal (but it IS heavy duty!)
Step 4
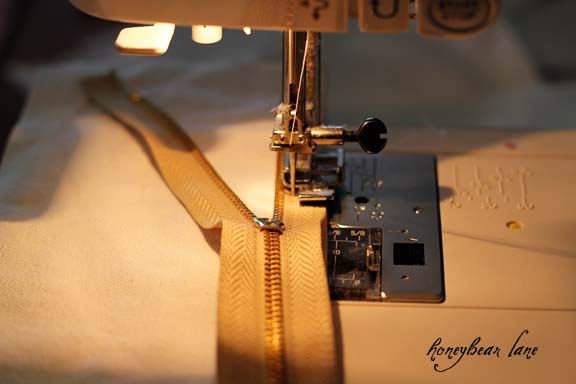
Do you see where my needle is? I sewed down a little bit, close to where the zipper pull is. Once you’ve sewn a good distance away from the top of the zipper, you can carefully zip it back up (you might have to pull your needle out to let the zipper get by.)
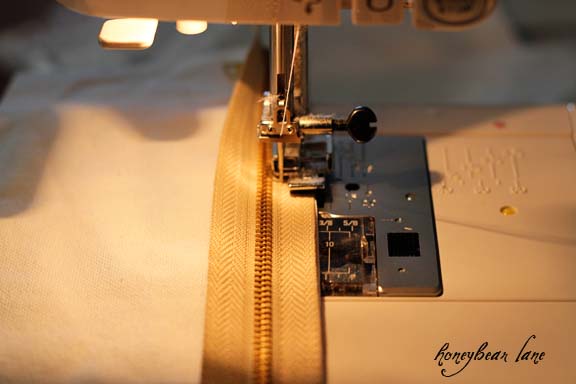 And voila, back to normal. Now you can finish sewing along the side of the zipper until you reach the bottom. I should probably mention that the place you are sewing is on the edge of the fabric you lined up, if that wasn’t already implied, sorry.
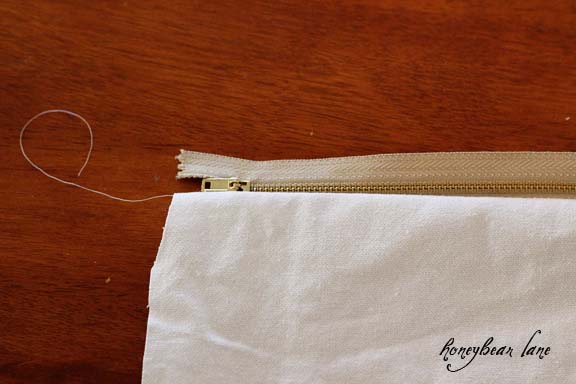 Once you’ve sewn to the bottom, you can flip it over and see the beginning of your zipper! Now you just need to do the same thing to the other side.
Step 5
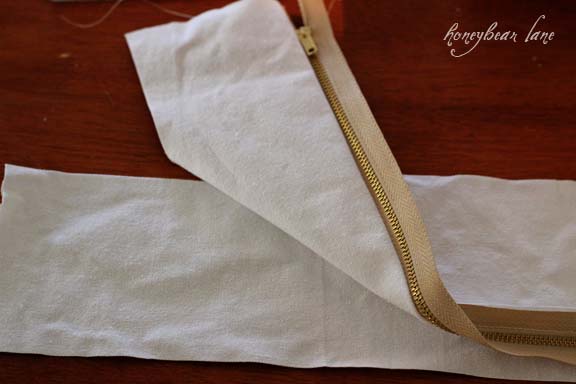
This is a little tricky so hopefully the picture explains it best. Once you’ve opened up the sewn part of the zipper (you can iron it flat if you desire) the you line up the other side of the zipper with the other strip, right sides together. So flip your zipper/fabric over and put it on top of the other strip, lining up the sides that haven’t been sewn yet.
Step 6
You will want to sew with the zipper side up so you can get close to the zipper with your needle, but unless you switch your foot to the other side, you will be sewing from the bottom of the zipper to the top. So start at the bottom, sew until just before you reach the top, unzip a little (get that zipper pull past your needle) and sew to the end of the zipper.
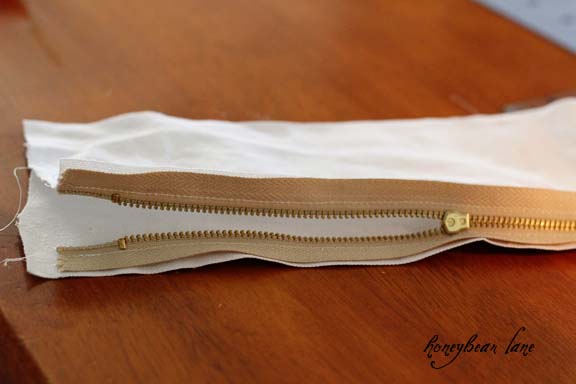 This is what the backside should look like, see how I’ve unzipped a little?
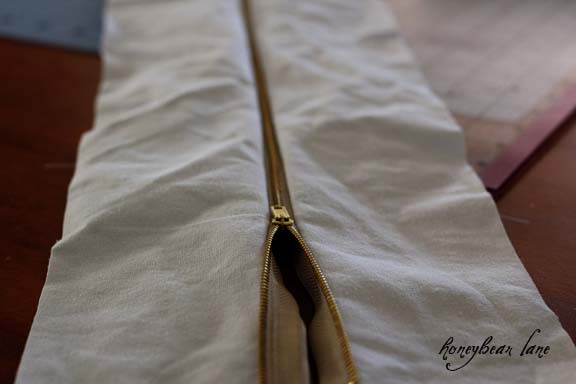 Now you can open up the whole thing and this is what you get! Cool, no? It will be all puffy so smooth it down and finger press (unless you are less lazy than I and actually iron it down first) the fabric down next to the zipper, flattening it all down.
Step 7
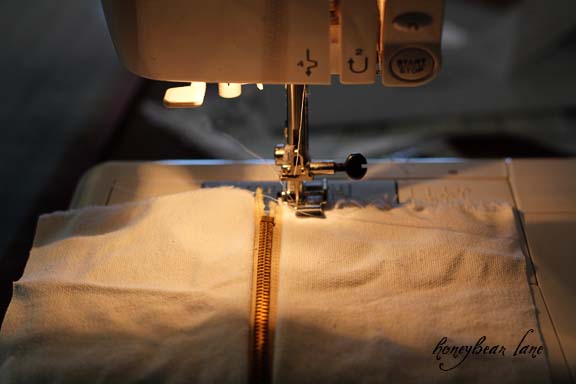
The last thing to do is to top stitch the fabric down next to the zipper so you have a crisp clean look. It’s really easy…just pull the fabric down with your fingers and sew down along the edge of where the fabric meets the zipper. You don’t even need to unzip for this. Do both sides.
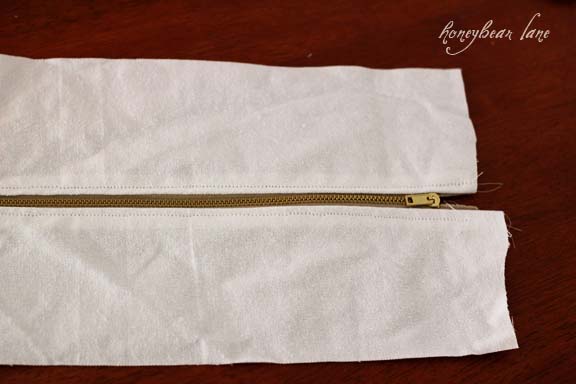 And here is the finished zipper piece!! Hooray! Super easy. And that’s nice when you are making six couch cushions. Later on I will show you how to insert this zipper piece into the cushion cover.
Good luck zippin!

I LOVE your site! One complaint about your instructions–You neglected to count in the seam allowances for the piece of fabric for the zipper. It needs an additional 1/2″ or whatever for the zipper plus the seam allowances for the edges. I had to re-do mine. However, so far everything is working out good. Thanks!
I stumbled upon your site and I’m so happy to be learning how to make my own sofa cover. I never imagines sewing my own cover, and I am so scared of sewing zips. But after reading your tutorials thus far, I am a little braver and will venture on to read the rest of your tutorials on the steps to make the whole sofa cover. I am gonna be saving so much money and it’ll be great using a cover that I’ve made myself. Thank you so much for inspiring me!! You are very talented!
Very nice tutorial. One suggestion I saw on Youtube seemed to work well if you can sew a perfectly straight line. Determine your seam allowance for the zipper, then sew the two panels together, right sides together… using your longest basting machine stitch. Press the seam open. Align and staple the sipper in place so the teeth are centered on the seam. (staples are a fast way to baste, just keep them away from the needle area and don’t use on silks or vinyl fabrics) Top stitch down both sides of the seam. When that is done, remove your staples and use a seam ripper to remove the stitches down the center line. Pick any bits away. I like to overlock the edges, especially if the upholstery fabric is likely to unravel.
My grandmother taught me this way to install zippers, but the staple idea is brilliant!
adidas terrex swift r2 gtx mens trekking shoes gore tex adidas bluenike air presto flyknit ultra men麓s nike basketball shoes gery 835570002nike air max 90 men shoes white843725 404 nike lunarglide 8 men running shoes binary blueb
sale nike huarache run safari gs whiteblack clay orange [url=http://www.kaysbridalandformalwear.com/Lagra/sale-nike-huarache-run-safari-gs-whiteblack-clay-orange]sale nike huarache run safari gs whiteblack clay orange[/url]
nike team hustle d 8 gs scarpe basket bambino neresoccer shoes child nike mercurial superfly cr7 whitescarpa uomo nike downshifter 6 684652 017 鈥?/a>cheap air force ones women china alliance for networking visual
adidas cadet vintage pas cher [url=http://www.clearbracesrockville.com/sprzeda偶/adidas-cadet-vintage-pas-cher]adidas cadet vintage pas cher[/url]
jordan air force 1 yellow jordan air force 1 black yellow moair max 90 air force 1ciekawostki o air max nike kt贸rych nie znali艣ciewomens nike air max 1 sp
nike 818730 100 damen golfschuh nike blazer [url=http://www.atmospheredisplays.com/sklep/nike-818730-100-damen-golfschuh-nike-blazer]nike 818730 100 damen golfschuh nike blazer[/url]
shoe custom nike air max 1 premium id in wolf greyturf orange zigair force 1 high lv8 black 806403 004adidas iniki runner boost pink gum low womens running shoe pinkwhite by9094newest nike free 4 0 ii flyknit running shoes for women gray pink gray
buty victory [url=http://www.themalleckfamily.com/p氓-nett/buty-victory]buty victory[/url]
nike presto fly greenwhiteblackair zoom pegasus 33 turquesaadidas running shoes supernova men blue black white solarbuty nike air max 90 id r 43 m臋skie neonowe
high cut nike air max 2015 womens black argento grey 8prt74 [url=http://www.tawoodsservice.com/a-buon-mercato/high-cut-nike-air-max-2015-womens-black-argento-grey-8prt74]high cut nike air max 2015 womens black argento grey 8prt74[/url]
buty nike air force 1 flyknit niskie damskie czarnebia艂eczarne pl924 33159zapatillas nike air force 1 07 urbanas negro para mujer ndpm cargando zoomnike air span ii hyperpinkjordan true flight black gold 5
nike air zoom elite zoom 路 pink [url=http://www.aleecarosalon.com/het-f枚rs盲ljning/nike-air-zoom-elite-zoom-%c2%b7-pink]nike air zoom elite zoom 路 pink[/url]
adidas nmd r1 primeknit schuhe aq0899nike air turbulence skonike air max plus 852630 028 schwarznike basket jordan eclipse junior ref 812871 005
nike flyknit max 2015 620469 102 retail oreo 8 5 [url=http://www.christopherveggetti.com/mannen/nike-flyknit-max-2015-620469-102-retail-oreo-8-5]nike flyknit max 2015 620469 102 retail oreo 8 5[/url]