Make Four Flying Geese at a Time
I have been working on a quilt for several weeks now, here and there, when I had time/desire/energy. But this quilt involved lots of flying geese blocks and I wanted to find a good way to make a lot at a time. I found a great method, and I’m going to share it here. You’ll get to see the final quilt reveal and pattern on the Riley Blake blog next week!
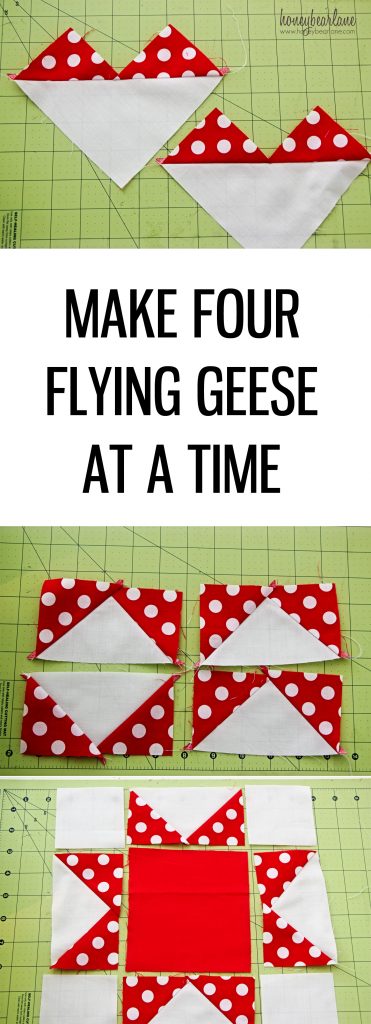
Make Four Flying Geese At a Time
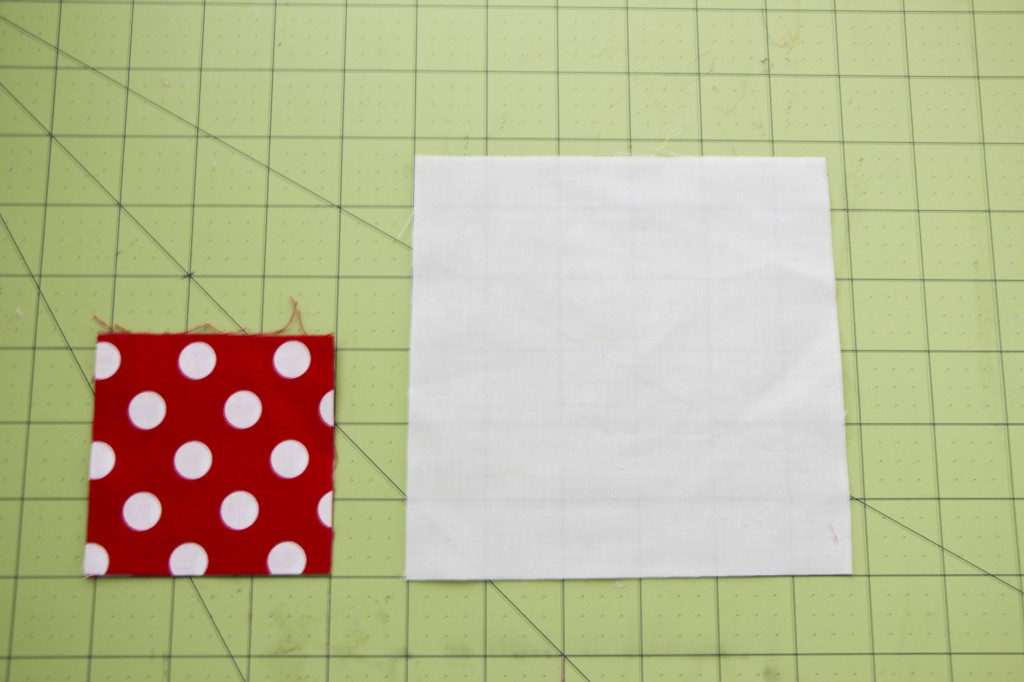
To make blocks that are 2 1/4″ by 4 1/2″, you will need one block at 5 3/4″ square and four blocks that are 3 1/8″ square.
If you want a triangle (the geese) to be the emphasis, make that your patterned fabric, but if you want two points (the sky) then make those your patterns. Since I’m making a star, I want the sky to be the dark fabric. You can also use four different fabrics to get each ‘sky’ to be a different fabric. This would work well if you are making a bunch of flying geese, which you probably would be.
To get a custom size, here’s the equation (ack–math!)
x=finished height
y=finished length
z=size of squares
Small Squares: x+7/8= z
Large Square: y+1 1/4″=z
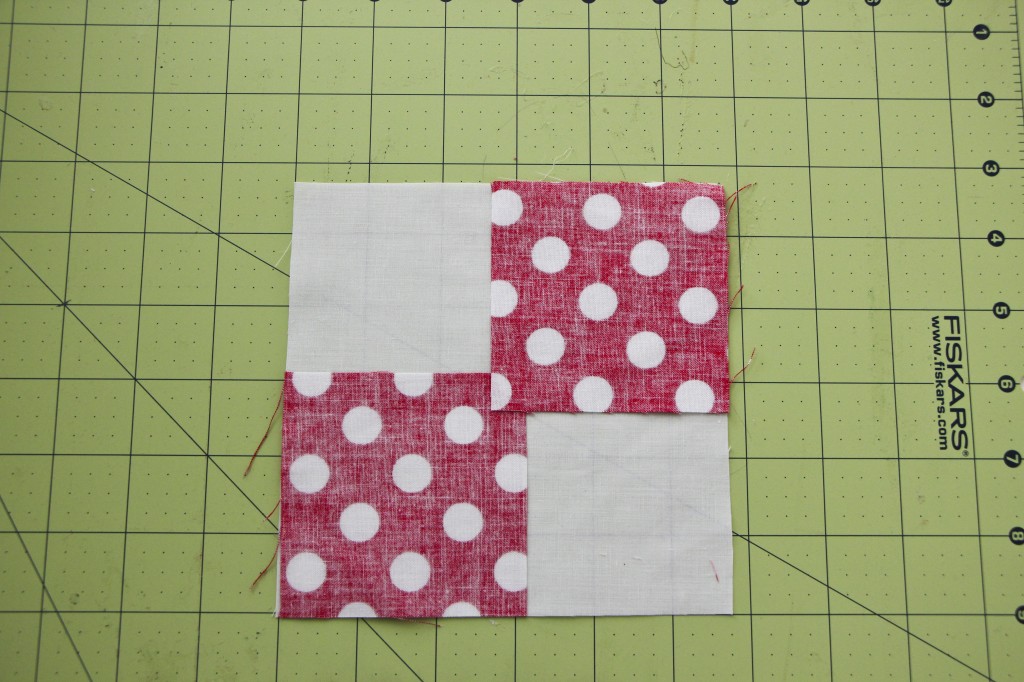
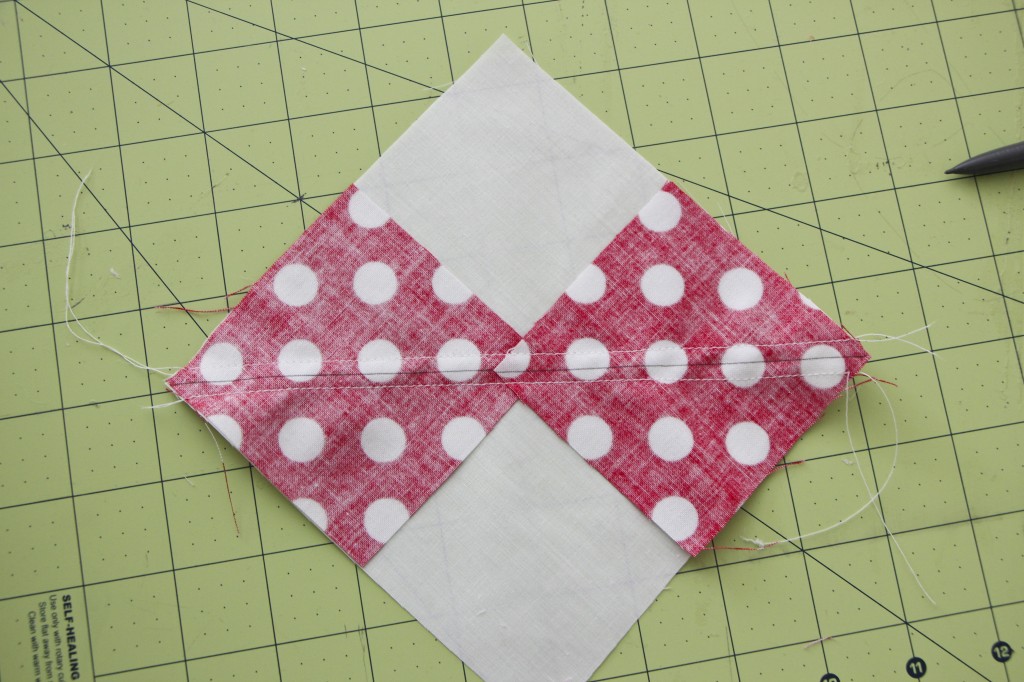
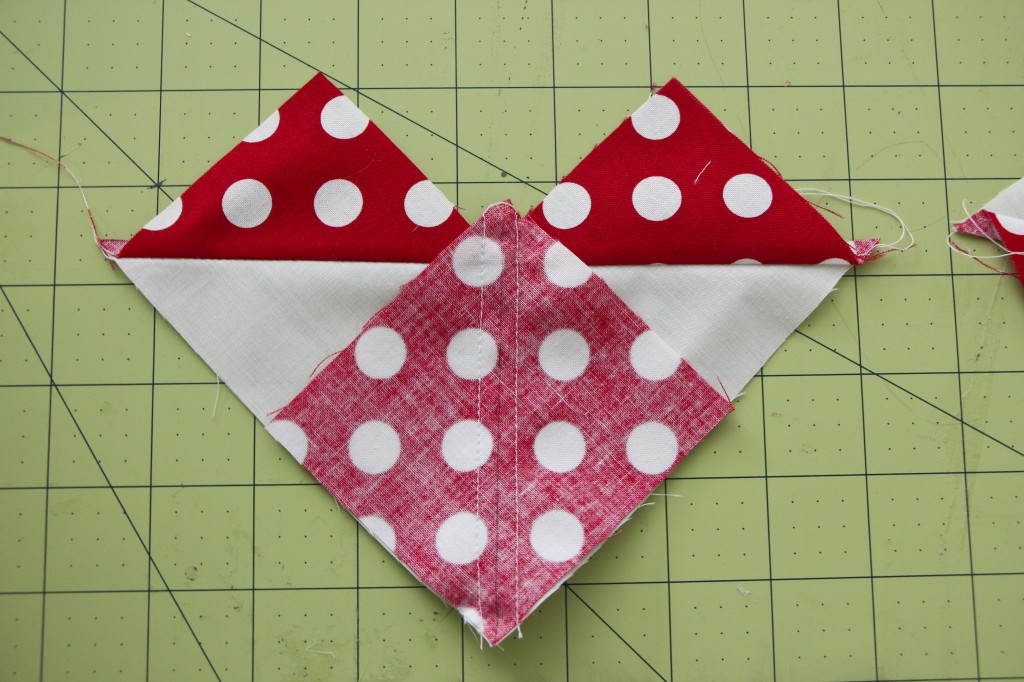
First start by layering two small squares on a diagonal, right sides together with the larger square.
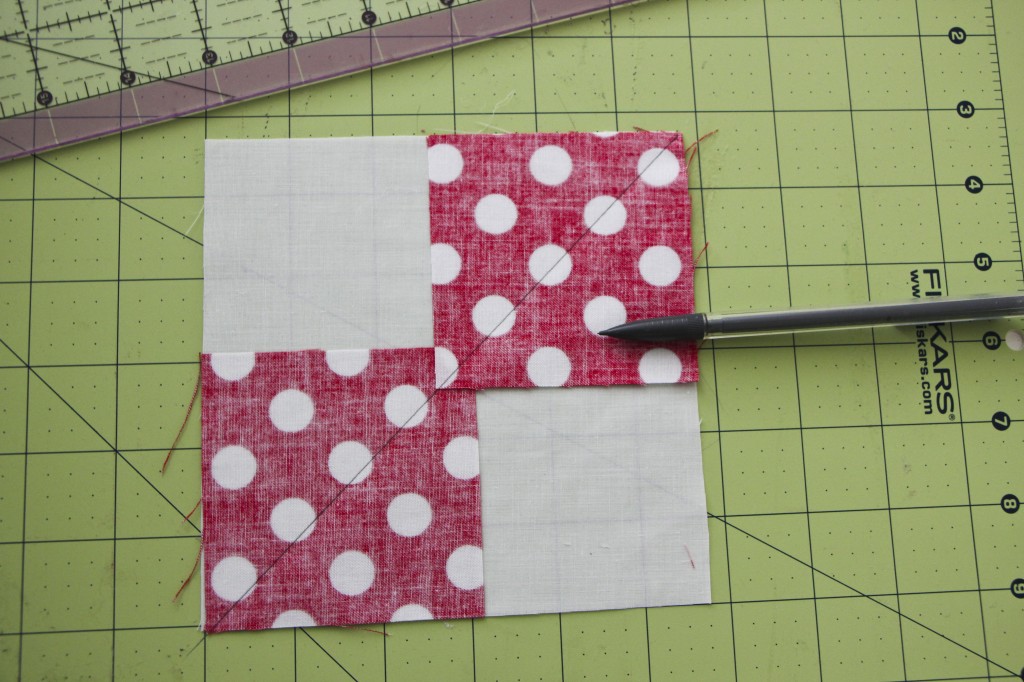
Then use a ruler to draw a line down the middle of the squares.
Sew a 1/4″ seam on either side of the line you drew.
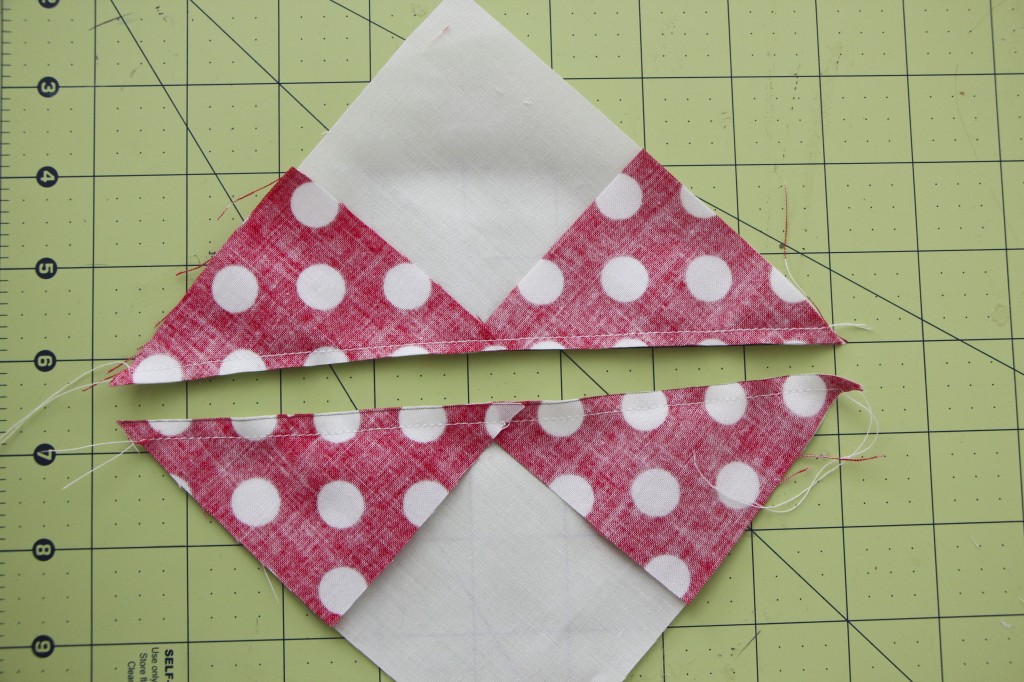
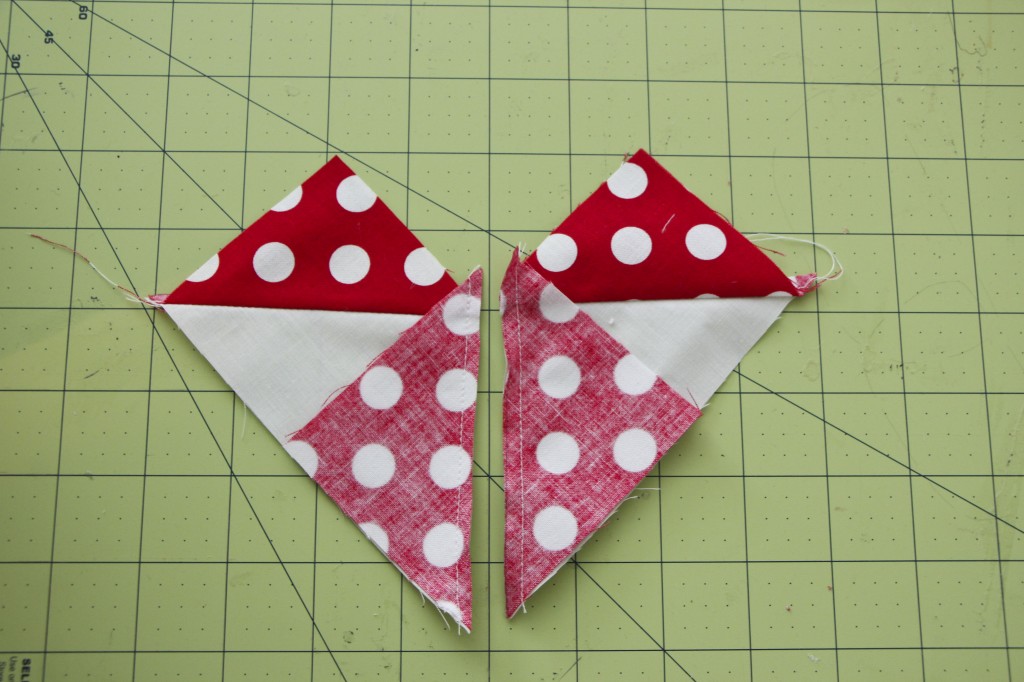
Cut apart on the line you drew.
Iron open.
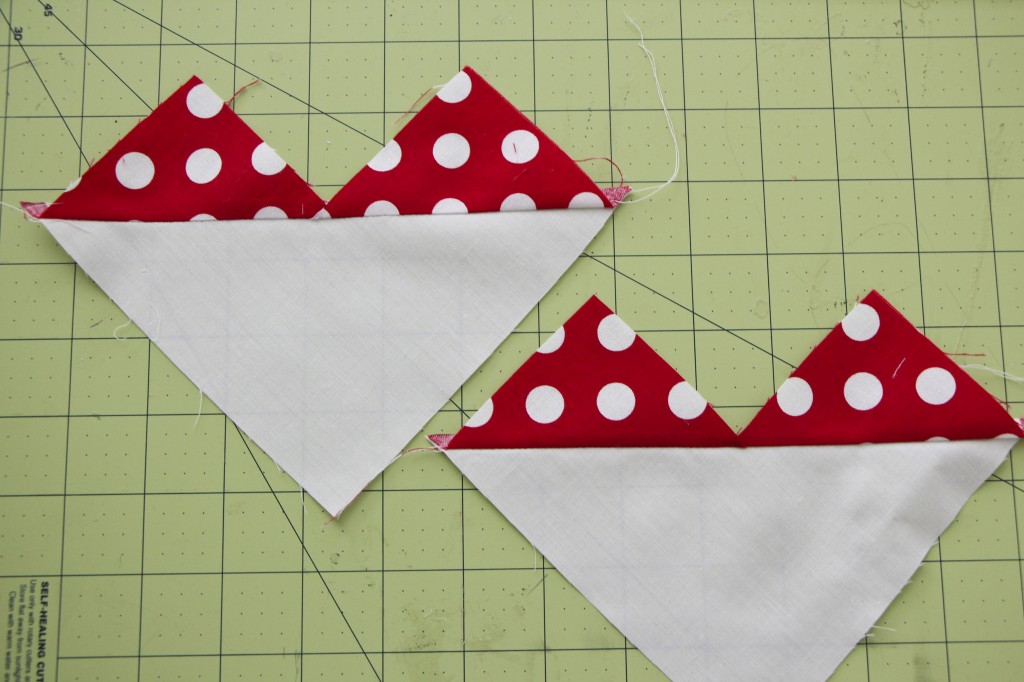
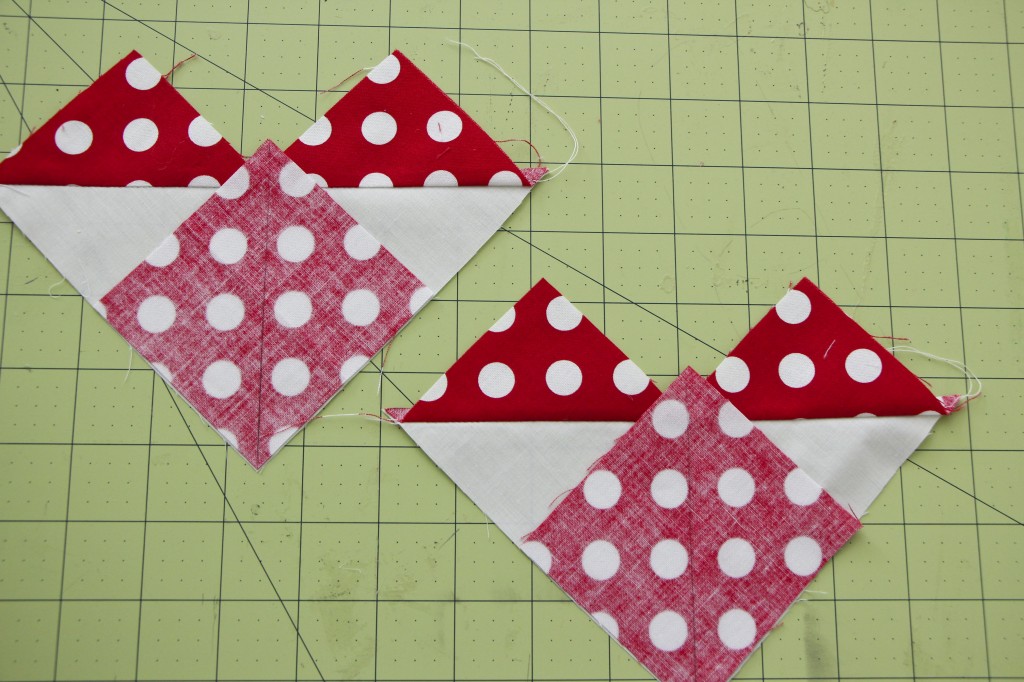
Then layer the two other small squares, matching them up with the remaining open edges of the large block fabric.
Draw another line down the middle of the small square.
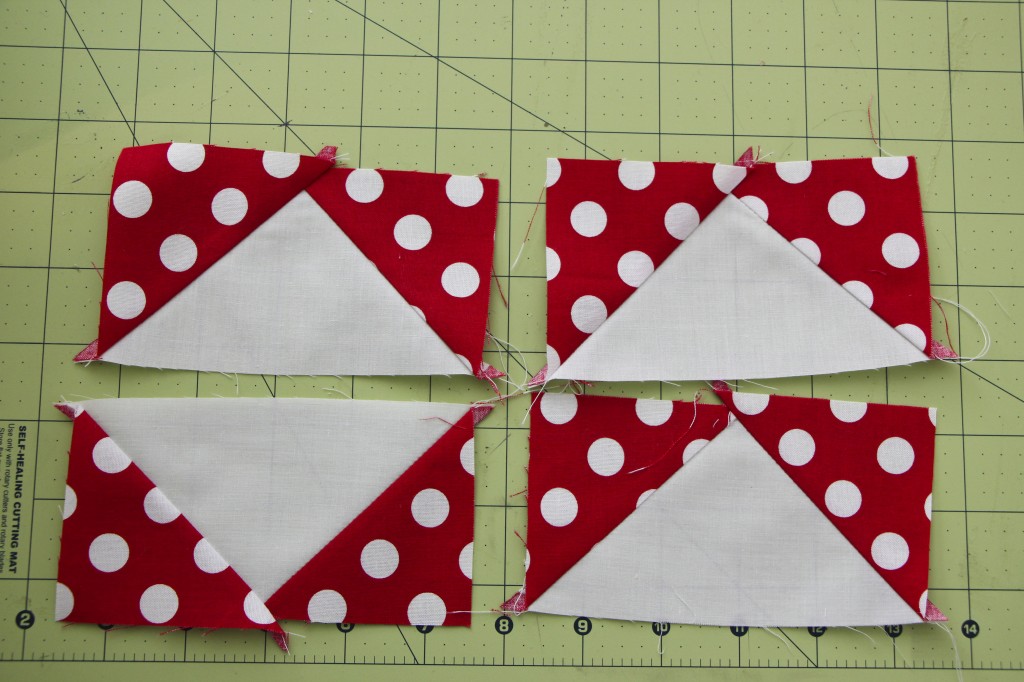
Sew another 1/4″ seam on either side of the line. Chain stitching makes this faster.
Cut on the line you drew. (Aww–it’s a broken heart!)
Iron open and done! Now you have four flying geese.
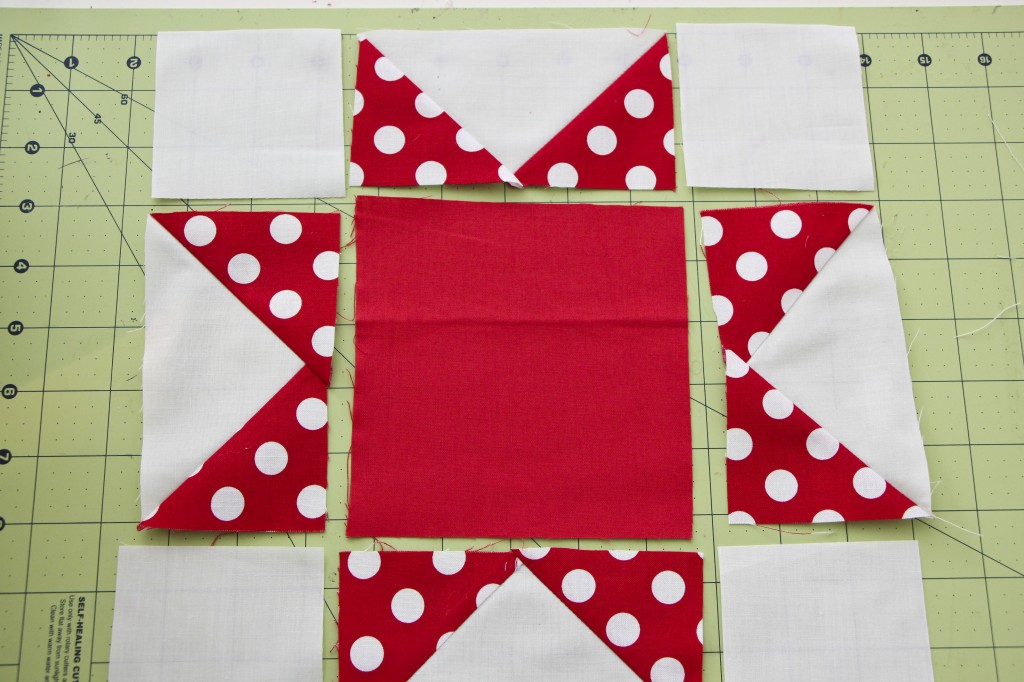
Now you can arrange them however you like. I’m making sawtooth stars.

That is awesome! I need to make a more adventurous quilt like that. They’re so beautiful! Love how yours is turning out. (Saw it via IG earlier today, love it!)
I love your quilt and want to make one myself. How big was your finished quilt? Do you know that the left side of your page is covered by the pinterest, facebook, Twitter etc bar (at least it is on my kindle). Makes it very difficult to read your instructions.
I probably would have loved this tutorial, but you have way too many ads, some of which cover up the pictures in the tutorial.
This looks great! I have a question: how do you adjust for losing the points of the star in your 1/4″ seam allowance? Thanks!
You made it look easy and this method will be much faster.
Thank you, I have just been searching for info about this topic for ages and yours
is the best I have found out so far. But, what in regards to the conclusion?
Are you certain concerning the source?