How to Replace a Kitchen Faucet
This is a Sponsored post written by me on behalf of Moen, Incorporated for SocialSpark. All opinions are 100% mine.
It’s been a long road to get to writing this post. And I want to tell you the story because after all this, I definitely have learned how to replace a kitchen faucet.
Moen asked me to review one of their kitchen faucets and show how simple it is to install. I said SURE! I love Moen and I knew exactly what I wanted to do. Plus, the faucet they were offering was similar to the one I have in my kitchen now and it’s superb. I don’t think I can go back to the older kind of faucets now that I’ve used the sprayer head faucet…seriously. It’s a lifesaver with cleaning off highchair trays and well, pretty much everything else.
I wanted to give this faucet as a Mother’s Day gift to my mom. She is doing so much to help raise my brother’s three little kids and could definitely benefit from a highchair tray-cleaning faucet like this one. So I surprised her with it and got to work installing.
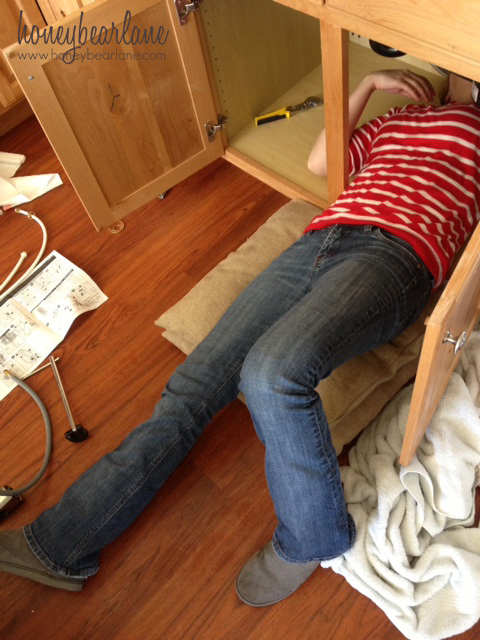
Or rather, got to work taking out her original faucet. Which turned out to be a LOT harder than I thought. I didn’t get very far. I turned off the water, unscrewed the lines, and then got to work unscrewing the nut that holds the faucet in place. Couldn’t.Do.It. As hard as I tried. And then my mom decided that she didn’t want the faucet anymore because she didn’t want to mess with the water lines anymore. So I hooked everything back up and went home to think about my next plan of attack.
My own faucet is only one year old and very similar to the Moen. But I decided to switch it out anyway to be able to complete this post. So this faucet is mine. I successfully removed it after a lot of effort, then installed the Moen. The Moen was VERY easy to install, but unfortunately I discovered the hot water line was a little short and kinked when connected to the valve. So no hot water would come out. You can purchase longer length hoses, but in order to replace it, I would have to remove the faucet entirely. So I decided to remove it and put my old faucet back. I am going to give the new faucet to my brother who is building a new house (and whose wonderful wife watches my kids all the time and is completely awesome.)
This is how it went down.
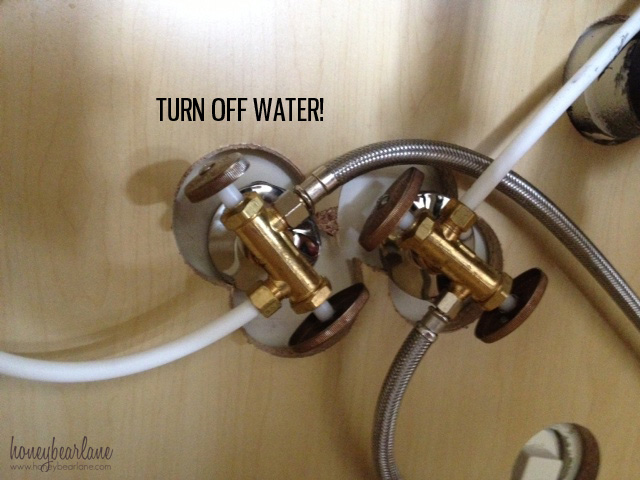
To remove the faucet, the first step is to turn off the water. Clear out the space under your sink so nothing gets wet in the event you get leaks or drips (which you most likely will.) Every sink system is different but you should see some sort of knob. Mine is pretty new and was easy to figure out. There were two knobs for both hot and cold water lines…I turned them both inward which closed off the water.
Step 2: Disconnect the lines from the water flow valves, using a wrench.
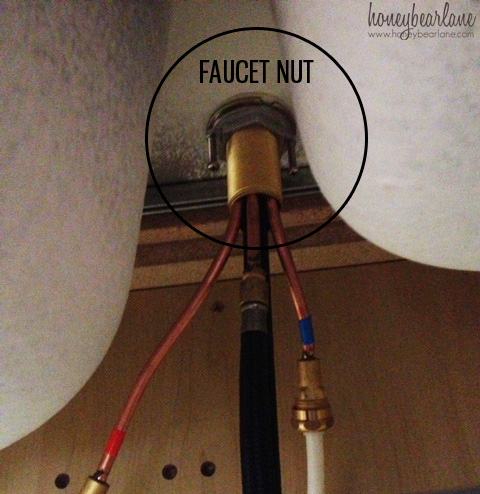
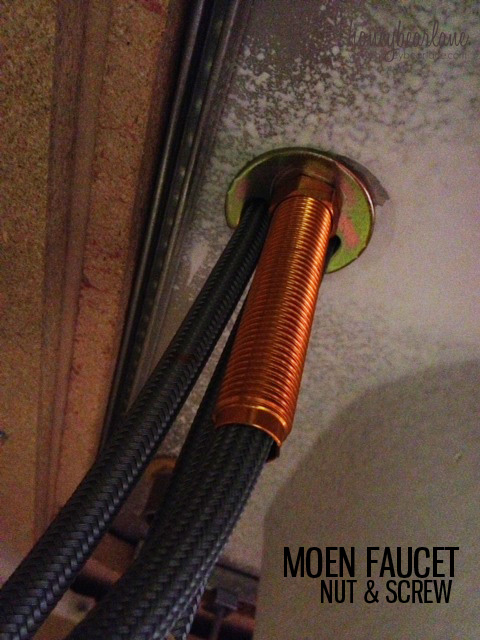
Step 3: There will be a large nut holding the faucet in place WAY up in that spot that is incredibly hard and awkward to reach. Grab a few pillows to put under your back, get a headlamp if you have one. Since every faucet is different the nut sizes will inevitably be very different as well. You may have to try a variety of tools to be able to get the nut loose. For my faucet, there were two screws in the nut. I loosened the screws and then used two wrenches holding on the screws to loosen it. Remember, righty-tighty, LEFTY-LOOSEY. To remove the Moen, they actually provide the tool you can use to reach the nut, which was very convenient. Save this tool after you’re done in case you need to remove the faucet at a later date.
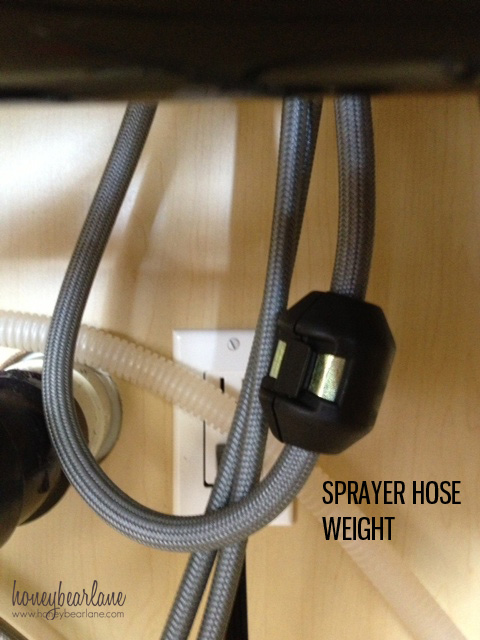
Step 4: Once the large nut is removed, you should be able to push the entire unit up and pull the faucet out. With the sprayer faucet unit, you have an extra hose down below the sink which should be able to be disconnected, making it easier to push up through. And it also has a weight on it which you need to remove as well. On my particular faucet (not the Moen), the connection was factory crimped and wasn’t going to disconnect. So I had to jimmy it (a very difficult task) to get the nut off all the pipes. The Moen has a compression fixture with the sprayer hose–all you have to do to connect and disconnect is push a little piece of plastic in the right direction. It was much easier to remove the Moen than my original faucet.
To Install the Faucet:
Step 1: The Moen faucet came with pretty good instructions. There are certain pieces you need in the right place, so just make sure everything is in the right place before you begin, by examining the instructions. Don’t remove any tape or caps until the instructions tell you to because they are there for a reason.
Step 2: Put the main faucet piece down the hole. If you have other holes from a previous faucet, the Moen comes with a nice plate that will cover those up. IMPORTANT: BEFORE YOU SCREW ON THE NUT, MAKE SURE THE HOT AND COLD WATER HOSES ARE LONG ENOUGH TO REACH TO THE VALVES. If they are not long enough, you will need to get a longer hose and measuring before hand will save you a lot of trouble.
Step 3: Have someone hold the faucet steady up above while you screw on the nut. There will usually be a washer as well. With the Moen, there was a washer and a nut and a little plastic thing that went on the end of the faucet screw. The washer goes on first, over only the faucet screw. Then screw on the nut. Screw the nut with your hand as tightly as you can. Then use the included tool to tighten the nut as much as possible, until the faucet doesn’t move at all. If you don’t have the tool, you can use an open ended wrench, adjustable wrench, or a basin wrench.
Step 4: Attach the faucet sprayer head to the hose on one end. Feed the other end up through the faucet to down below. Then remove the plastic cap. Connect the tip to the hose on the faucet, the hose with the compression fixture (the little piece of plastic) and clip into place. Pull the hose down so the full length is below the sink. Then add the weight to the hose, on the long hose side. The Moen weight just clips and unclips, very easy.
Step 5: Find the hose that is for the hot water and screw it to the hot water valve. Then find the cold water hose and screw it to the cold water valve. Tighten the screws as much as you can.
That’s it! I told you it was simple. But just to warn you, you will probably run into some type of issue, so just expect that. Reading this post will probably save you some trouble as you learn from my mistakes. But don’t be afraid of trying to do it yourself because I truly believe this is very doable and there is no need to hire a plumber and spend a fortune. Moen makes their faucets very easy to install and includes everything you need.
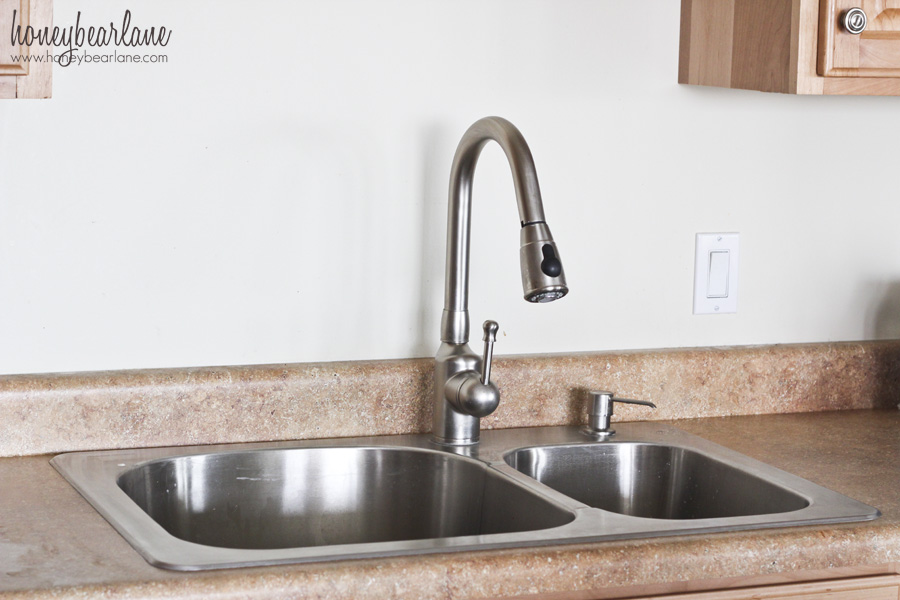
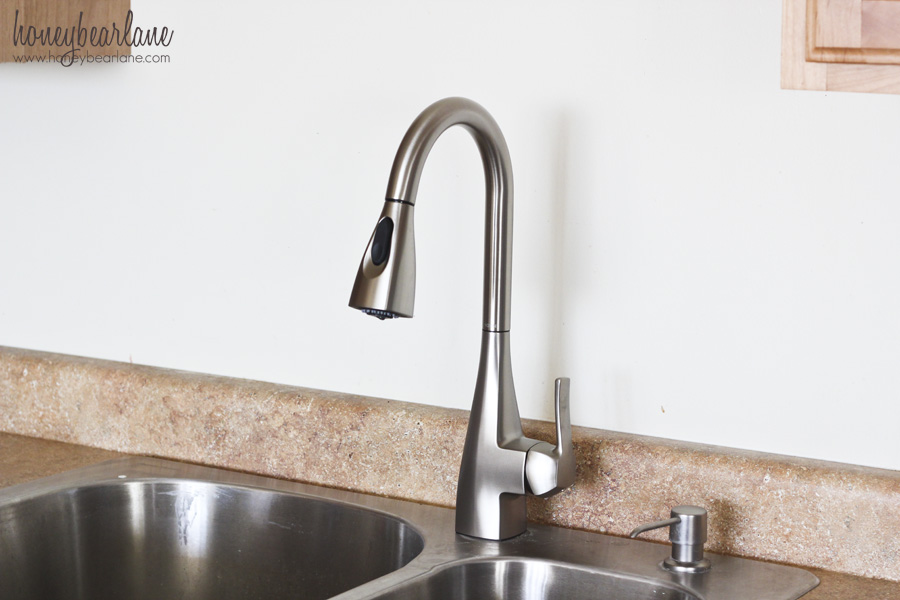
This is the Moen Kiran Faucet (shown above.) It’s a seriously beautiful faucet–and fingerprint/water spot resistant as well! It’s so smooth and easy to use, and I already raved about the sprayer style. The Kiran Spot Resist one-handle pulldown kitchen faucet can be found at Lowe’s.


our bathroom needs a new faucet, I’ll have to check them out!
Thanks for the tutorial!! Pinning for when I will need this later! 🙂
I replaced our kitchen faucet about a year ago and it was a huge pain! I love the look of the Moen and the sprayer would be so nice! Good for you to give it to your bro and SIL.:)
I know they are so lucky to have me 😉 It definitely is a HUGE pain to remove a faucet but the Moen was super easy to install!
Thanks for sharing a great article post on everything you need to know about replacing a kitchen faucet. As a journeyman plumber I always advise my clients to buy Moen. Great products, fair prices, great warranty and easy to install. Thanks for a good read.
I am trying to convert my kitchen sink from a double sink to a single farmhouse
But I have two drains and the single I have has one drain in the center. Can you provide instructions on how to convert two drains to single drain. Thank you
This blog post covers everything one needs to know about replacing a kitchen faucet, making the process much more approachable for those who might be hesitant to tackle it themselves. The detailed explanations and visual aids are especially helpful. Thank you for sharing your insights and making DIY faucet replacement seem manageable!