Saturday Series: "Bling Your Blog" Lesson 1
Basically it’s a picture that is also a link. You can make one for your own blog, or for your business if you have one. So let’s make one!
To start, create a small image (I usually do 125 pixels by 125 pixels, 72 resolution) on any image creating program. I love Photoshop, so that’s that I use, but you can use Elements, Corel, or even Paint! Save it as a jpeg. Here is my image:
Upload the jpeg to an image hosting program. I highly recommend Photobucket, mostly because I use it, but also because it makes it VERY easy to grab the html. After you have uploaded and named it, this is what it should look like:
See how it has all the data for the picture? (Email & IM, Direct Link, HTML Code, IMG Code) We will be using the HTML Code for our button. Click on the HTML code, it will highlight it and you can control + C to copy it (or command + C for Mac).
These next several pictures speak for themselves, but I will give you the rundown real quick. Go into where you edit your blog, under Design. Go to “Add a Gadget” then select the HTML/Javascript. Then Control + V to paste your html.
 |
| 1 |
 |
| 2 |
 |
| 3 |
Now you have your button, but it doesn’t link to anything. So go to the top right where it says “Rich Text” and click on that. You should see the button. The click on the picture to select it. Like this:
Now go up to the task bar where it has the picture of the link (next to the Text button.) When you click on this, you fill in where you want it to link. It’s easier to just control + C the link beforehand.
After you have entered the link and saved it, you should be able to go view your blog and see it. If you click on it, it should lead you to wherever the link is.
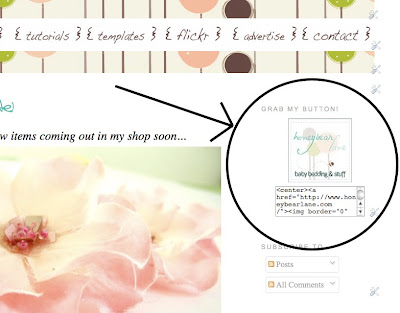
And there you have it! Your button! If you want people to be able to grab it, you need to have a little box of the html code below. This is how you do that:
This will be the code you will use:


omg i love you thank you for teaching us how to do that now i'm going to go make my self one
Amanda
http://patriciaraedesigns.blogspot.com/
I was just getting ready to post on my fb fanpage if anyone could help me do this!! TY, TY!! I need one for my Great Ornament Exchange!
Great! I'm glad you are already using it!
Thank you so much that is so helpful! I can't wait to make a button myself!
P.S. I'm sorry that you can't just copy the html code straight out of this post…when I posted the code it would just come out as the image, so I had to just take a screen shot.
Ok after all this time working with those html boxes I didn't know they had a rich text option for you to actually see your work. UGH! Thanks for sharing!! This will help alot!
Thanks so much for teaching us! I was actually trying to figure out how to make one! Just made one for my blog! http://www.soylicioussarah.blogspot.com 😀
Thank you for that amazing tutorial! I have always wanted to know how to do that!
Heidi, thank you!!! Love your tutorials, they're fabulous!
This is amazing and so enjoyable! The German Shepherds thank you!
you have a great blog!
and thanks for the "button" tutorial; I'm gonna try it.
Hi Heidi I just wanted to let you know I LOVE this tutorial and have been using it for quite a while now. Thanks so much for showing how to do this!!!
Omg! Thank you soooooo much for this tutorial!!! I have been struggling with this for so long and I finally got it to work thanks to your tutorial!! Just uploaded one onto my blog! check it out! http://www.aquabrocade.blogspot.com thanks so much : )
Have a wonderful day! I know I will, now that I have a grab button on my blog>>> thanks to you!
~ Kim
Great job! So glad I could help!
Hi, this is a great tutorial! HTML code and design isn’t my forte but this is helpful. Quick question that you may be able to help with. When I try to hyperlink my button as you instruct I get an error message saying an error has occcured, function 100, error expected. I can do everything else but the button goes to my photobucket account instead of my blog. Do you know a way around this? Thanks so much!