Stacked Applique Tutorial & Happy Sewing Month!
Enter the Mama Stellato Giveaway HERE
*******************
*******************
Happy Sewing Month! I was going to write a fun historical fact about sewing, but nothing was really all that…fun. Sewing? Awesome. History of sewing? Snooze-fest.
But I’m planning some fun stuff for you all in honor of National Sewing Month, so get excited! And if you’re at all curious, pay attention to today’s tutorial.
Supplies:
- A tshirt, onesie, or whatever fabric you’re going to put the applique on
- Fabric(s) to create your applique
- Wonder Under or other fusible adhesive paper (like Fuse2Fuse or Heat N Bond, but I like Wonder Under)
- Lightweight fusible webbing
To create your applique:
First, create a template. I use the cardboard on cereal boxes. You can freehand draw it, print something out on your computer, or use one of my templates (found in the templates link) then cut it out. If you are creating a more complex applique, make sure to cut out each piece. Then take out your fabric(s) and put the adhesive paper glue-side down (you can feel its more rough.) Iron the paper on the fabric on a medium-hot heat, holding the iron in one spot for at least 5 seconds. Let it cool. Then trace the template (reverse side up) onto the paper, which makes it very easy to cut out. Cut our your pieces and when you’re ready to iron, peel back the paper!
 |
| I’ll demonstrate a stacked applique. First layer is the background. Iron. |
 |
| Add the body. Iron. |
 |
| I add more body parts, which gives the applique a lot of depth. Iron again! |
 |
| Last things, eyes, beak, brown wings. Iron again. |
 |
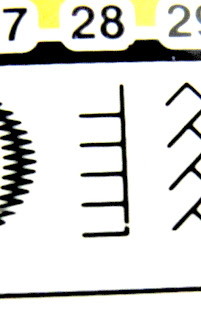
| I also like to use #5 and #8 (zigzag.) Sometimes I use a plain stitch, for more detailed appliques, like the White Tree Onesie. |
 |
| Clip all your threads (remember the ones on the inside!) You’re done! |
Now go applique away!
P.S. Do you want to applique this owl? You can purchase the applique kit HERE
P.P.S. I have just added new templates to the Templates page!


I love this! So cute! I've only done a few appliques (not stacked) and I've never even used the applique stitch. I just recently got a machine that actually offers more than 2 stitches so I can't wait to try this again! I'm sure it's going to look so much better than the appliques I've done in the past! Thanks for sharing!
I love your tutorial and tips! Could you recommend a good first sewing machine to me? I want to purchase one but don't know where to start.
Thanks!
Tara
I have a Janome Magnolia, which is probably an average choice as far as price is concerned (not too cheap, not too pricey.) I actually just got it this year and LOVE it…it has never given me any problems whereas my old one (a Kenmore) broke down every time I looked at it funny. I love Janomes and hear they rarely ever need repairing, which is a huge bonus for me (having spent tons of $$ fixing my Kenmore.)
But I have heard that most Brothers and Singers are good reliable machines. If you think you are going to be doing more than a little sewing, I would get an electronic machine instead of the basic $100 ones that do the job but are very…well, basic. You should also purchase your machine at a sewing machine store because you can often get really good deals as well as benefits (like a perks card or free repairs for a year or whatever) and you have a wider selection. Good luck! Let me know what you purchase!
Thank you so much! I got my first sewing machine recently and this looks like something I could potentially tackle!
I have a question….what kind of "lightweight fusible webbing" do you use for the backing? I used wonder under for mine, and once it tore away it left a sticky residue. I covered it with a scrap of fabric since it was on the inside of a garment and no one would see it anyway, but I was wondering what else I could use to avoid this next time. Thanks!!!!
Thank you so much for this tutorial. I just got a sewing machine for Christmas and was anxious to try and applique with it. I chose a penguin for my first go round and thought it was pretty basic until I got to the tight curves and small eyes. Any suggestions for circles and ovals and sewing in a circle? Should I adjust the stitch width or length or use the same as the rest of the body? Thanks for the help!