Catablog · Holidays · recipes · Thanksgiving
Make a Cornucopia From Breadstick Dough
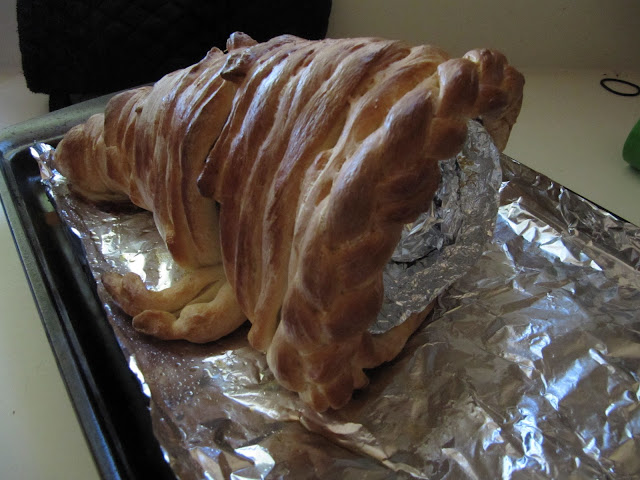
Okay so this had the potential to be a really cute project. And when I do it again, it will be. But it was the first time I did it, so there were dumb mistakes. And I stupidly forgot to take a final picture, so just pretend it looks awesome!
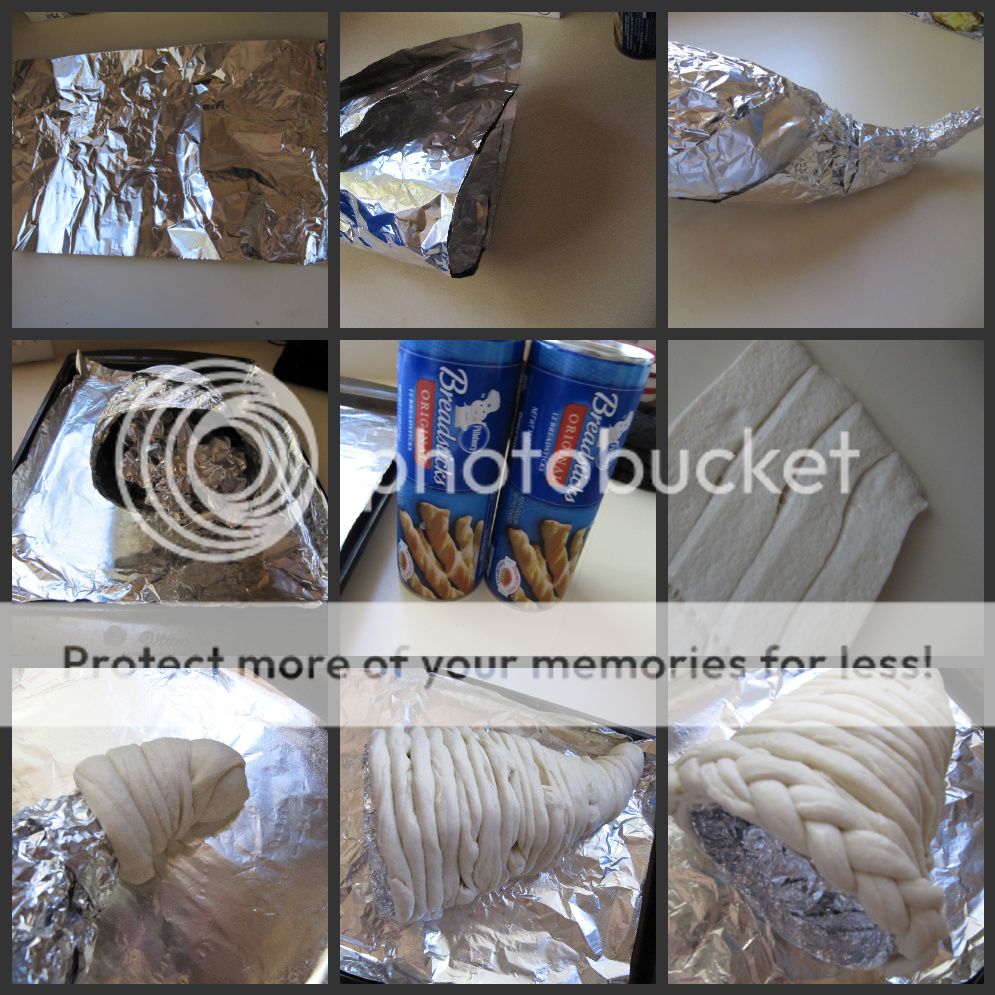
Step 1. Use a piece of heavy piece of foil and spray it lightly with cooking oil. Wipe off the excess, you want it to not stick but not be slippery.Step 2. Bend the foil into a cone.Step 3. Twist the end up so it looks like a sad cornucopia.Step 4. Loosely ball up some more foil and stuff it inside the cone.Step 5. Get out your breadstick dough. Don’t use other kinds of dough because it doesn’t work.Step 6. Shape your dough from the flat things into rollsStep 7. Start winding the dough ropes around your cone, being sure to pinch each connection.Step 8. Wind around the whole thing, but save three ropes.Step 9. Braid your last three ropes to put at the opening of the cornucopia.(no picture) Step 10. Brush an egg wash over your dough, bake at 350 degrees for about 45 minutes until it gets a nice deep brown color.
This is a VERY easy project to do that makes a great Thanksgiving centerpiece. You could make it a tradition to do with your kids before Thanksgiving each year! Also, you could make it a few days ahead of time since it holds very well. And after Thanksgiving is over, your can rip it up to use for eating with chili or soup!


That is so clever! I'm totally going to try this! Thanks for sharing!
SO awesome!! I love the texture of it:) Great idea!
Oh, my goodness! That is the cutest thing ever.
I may have to try this next week myself.
Thanks for the tutorial.
I'm going to share this page on my FB. My friends are going to love it as well.
That looks great! Love the idea of putting veggies into it and serving along with veggie dip!
I love that! And sure I'd love to do a guest post. Just let me know what to do? 🙂 thx. miss fergie
That's awesome looking. Maybe I'll give it a try this year. Am now a new follower:)
What a fun way to dress up your Thanksgiving table! Maybe I'll try making one this year.
Loved using premade breadsticks! I did this tonight for my family and guests and it was a big hit!
That's such a great idea!!
really cute idea heidi!!
I totally did this on Thanksgiving. Thanks!
This is a great project! Thank you for sharing 🙂
I’ve made this cornucopia for years and it always looks unbelievable. I have a lot of freezer space and usually put it away for the next year. One year I filled it up at the buffet table with rolls.
Thanks for this idea (found it on Pinterest)!! I just baked mine (only took about 30 minutes), and it looks so much better than I expected,given my meager talents! Glad I checked 5 minutes in- just used a spoon to squish 2 ends that had separated closer together. I am just thrilled!!
I make this every year. Always a hit! Just a few tips….As you get to the bigger part of the foil, just stretch and lay the bread sticks over the top and have them meet on the bottom. It looks nice and even that way. I put in some toothpicks to hold the pieces to the bottom or anywhere it seems loose. Take out afterwards. Also, after the egg wash, sprinkle sesame seeds. It looks really pretty. One last thing….if it needs to bake longer on the sides, place foil lightly on the top to avoid it getting too brown.