Fireplace Mantel Makeover, Part 1
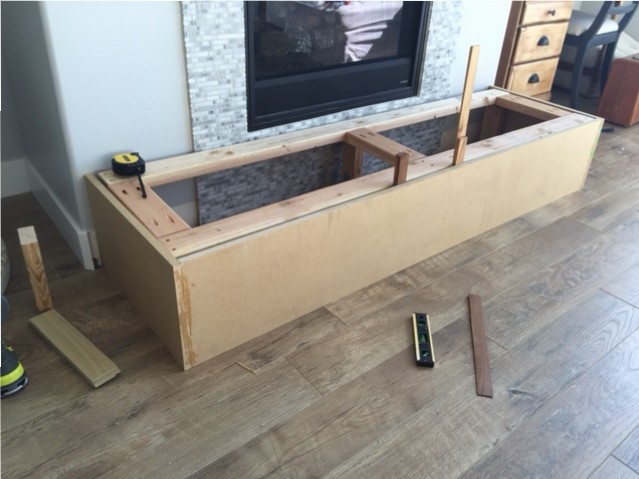
Once this structure was built, I removed the baseboard behind it and then screwed it to the floor. This is where it got all wonky, since this wood was just sitting in my basement and pretty warped. It’s always helpful to use straight wood, FYI. I decided to built the MDF around it, making that as square as possible and then using shims to make the whole thing square.

I carefully measured and cut the MDF so that the seams would be in a place that gets covered by trim. I glued and nailed these together. Then I set it around the 2×4 frame and had to use shims to fill in gaps here and there where it didn’t meet up right with the frame. I nailed it to the frame using 2″ nails. I used a square and a level a lot during this step and in the end got it pretty dang square. I cut off the shims that were sticking out with a Dremel.

It literally looks amazing. I wish I had room in our teeny little farmhouse for a mantle. Maybe someday when we build a home. Great articles – gorgeous site.
http://www.theruggerooster.com/blog
Thank you!
What is the brand and color of tile that is on your fireplace? I’m considering herringbone, but really like yours. Thanks
Thanks! I honestly don’t know because we chose it at the design center of our home builder. Sorry that’s not very helpful!